Maker Moment: Make Do and Mend

Throughout the late fall, winter, and early spring months, I live in Express Columnist pants and basic V-neck sweaters for work. Each year I’ve purchased one or two new colors of each, so that now I can go about a week and a half wearing nothing but that uniform before needing to do laundry. The constant wearing and washing eventually takes its toll, however, and over the years I’ve had to mend the occasional dropped hem or split seam.

At some point this past year, I started to let the mending slide. A hidden button came loose, and instead of immediately reattaching it, I put it in a safe place and set the pants aside, intending to deal with them before the next wash. Instead, as soon as I was at the bottom of the drawer and in need of something to wear, I pulled the pants back into rotation, deciding that the button wasn’t really needed anyway and I’d fix it after they’d gone through the wash.

You can see where this is going.

Soon, I found myself pinning up the dropped hem of a pair slacks every time I wore them, each time telling myself that I’d get to them just as soon as they were clean and pressed again. It was important to me that I didn’t look sloppy, but apparently not important enough to take the time to fix the problem properly. Meanwhile, more buttons popped off, pocket bags frayed open, and one by one my sweaters developed holes in the underarms. My pile of to-be-mended garments kept growing, until it started to feel like there were more items in it than out of it. (Not really true, but it certainly felt that way when that’s where all of my most-worn garments were living.)

During the winter’s first (and quite likely only) snowfall, I decided there was no better way to spend a house-bound afternoon than finally buckling down and doing the mending. And as soon as I settled in with needle and thread, I was reminded of how much I actually enjoy hand-sewing. Others may find it tedious, but I find the slow, meticulous, and repetitive nature of the work soothing, especially when accompanied with a hot mug of tea.

In a couple of hours, I was able to hem two pant legs, close up three pocket bags, and repair holes in five sweaters, including invisibly fixing a hole in the middle of a sleeve by grafting the edges closed. When I finally tied off the last thread and announced my success, Justin quipped, “It’s like you have a whole new wardrobe!” When I mentioned my project to a coworker, she had the exact same reaction.

A bit of a stretch? Sure. But they captured the spirit of the thing, which is that giving life back to your favorite garments—whether it’s by mending them or by some other trick, like upcycling—gives you the thrill of “having things to wear,” with the added bonus that you did it yourself.

Have you shown any of your favorite garments, me-made or otherwise, a little love lately? They’ll pay you back for the effort, I promise.

FO: Christmas Party Dress

In an effort to live up to the name I’ve chosen for this blog, I’m finally bringing out something pretty to share! This is my last finished project from 2016, photographed after the first (and very likely only) snow of the winter. Although the temperatures were hovering around freezing, the fresh powder was too pretty to pass up. And since we’ve had almost exclusively damp, grey days since, it was worth enduring 15 shivering minutes to capture these photos in a rare moment of natural light.

Let’s rewind to the beginning of December, when my company holds a Christmas party for all of the staff. They rent a small ballroom at the local university and, as our office is decidedly business casual throughout the rest of the year, many people take it as an opportunity to dress up. Last year I played it easy and safe and wore a dress that I had purchased last-minute to wear to a November wedding, but this year I really wanted to express myself by making my own dress.

I had it in my head that I wanted a swingy, buffet-friendly silhouette in a festive gold. For the pattern I picked New Look 6469 View A. My original plan for the fabric was something more champagne-colored and sparkly that I had seen while browsing JoAnn’s website, but sadly, my local store barely had enough on the bolt to make a placemat, and I’m not sure it would have been weighty enough for this look anyway—too much cling and not enough drape, you know?

I was in a bind, however, because I was shopping a week before the party and didn’t have time to look elsewhere or order anything online. Like Camille, I settled for a crushed velvet instead, and also like Camille, I harbored serious doubts about the success of this project. Imagine me standing in the aisles of JoAnn, frantically Googling “crushed velvet dress” and trying to find examples that did NOT trigger flashbacks to teen movies from the 90s. (My Date with the President’s Daughter, anyone?) I took a gamble and decided that if the project was a total failure, I still had the dress I’d worn the year before, as well as a couple of older dresses hanging in my closet that would work in a pinch.

Armed with pattern, fabric, and the impetus of a swiftly-approaching deadline, the entire thing came together over five carefully scheduled nights:

  1. Press the tissue and roughly cut out the pattern pieces
  2. Trace off the pattern and make adjustments
  3. Cut fabric
  4. Sew together body, sleeves, and collar
  5. Hem (and re-sew the collar, which was unplanned)

I cut a size 8 based on the finished bust measurement. The only adjustment I made to the flat pattern was to omit the back zipper and cut the back as one piece, since the fabric is a moderately stretchy knit. I basted everything together on my sewing machine using a zigzag stitch, then serged everything with a light tan thread that blends nicely with the underside of the fabric. I’d like to reach a point where I can assemble + finish knit garments in one pass on the serger, but I don’t have a good feel for it yet, so I’ve settled for doing construction in two steps to try to ensure the seams stay lined up properly.

After sewing everything up, I realized that the collar is drafted quite high and snug; I could barely pull the dress over my head and felt like I was being strangled once I did. I forewent any serious modifications to the neckline—because it would have no doubt involved cutting a new collar, which I didn’t have time for—and settled instead on serging around the neckline a second time, cutting off the previously serged edge. This had the effect shortening the height of the collar and widening the opening all the way around, which loosened the stranglehold somewhat. It’s still not the most comfortable thing in the world, but I was able to tolerate it for the few hours I was at the party.

I like that the sleeves have darts to help the shoulders lie smoothly, but I think the armhole is cut a bit too deep for me, or else the raglan seams aren’t quite the right shape for my torso, because I feel like the dress hikes up too much when I lift my arms up or forward. It’s certainly not enough to be indecent, but it’s something I’d want to tweak if I use this pattern again.

The sleeves are also annoyingly just too short, more of a bracelet length than a true full-length sleeve. It’s possible they only seem that way because of the aforementioned armhole depth and/or raglan shaping issues, but it’s worth considering, especially since I’m only 5’2″ and never have a problem with things being short.

The sleeve and dress hems are serged, folded under, and top-stitched down using a light golden yellow thread. Hand-stitching the hems probably would have had a nicer, subtler effect, but I didn’t leave myself enough time for that, and I don’t think the overall look is spoilt because of it.

Despite my fears, the dress garnered nothing but compliments all night, and it was plenty comfy for mingling, munching, and absolutely crushing at Texas Hold’Em. It’s also gained me a bit of a reputation around the office as someone who makes things, something I hope to cultivate with future garments more suited to day-to-day wear. With any luck, I’ll be able to coax a few sewists or would-be sewists out of hiding. 😉

FO: Pokémon GO Trainer

Knowing that Halloween in central North Carolina is usually chilly, especially after the sun goes down, I opted not to play the shorts-and-crop-top-clad Misty opposite Justin’s Ash Ketchum, and instead chose to be a trainer from the Pokémon GO mobile game. Specifically, my own avatar from the game:

Cute, no? And here’s my interpretation:

There are a lot of pieces to this outfit, and despite my best intentions, I wasn’t able to finish all of them before Halloween was upon us. So I consider my version more of a first draft than a completed cosplay. (Whether I ever go back to finish it remains to be seen.) But what I did accomplish is definitely recognizable, and might offer a few hints to anyone looking to do something similar, so let’s go with it.

When I looked for inspiration from other cosplayers and bloggers, I found that most had created their costumes shortly after the game had come out, and so they had largely assembled their looks from ready-to-wear or easy-to-sew separates. By the time I was getting on board, McCall’s had released M7556, a romper and cropped jacket pattern aimed at Pokémon GO players.

I snapped up the pattern, but quickly decided that while I would use the jacket, I just wasn’t interested in the romper. I understand that it was most likely designed with accessible sewing and forgiving fit in mind, but it just doesn’t look enough like the source to me. I briefly toyed with the idea of eliminating the princess seams to make it work, but I couldn’t get my head around it and wasn’t sure it was such a good idea anyway—seams and darts exist for a reason, after all—so I embarked on a journey of hacking and slashing to create my own design.

From what I can see in the screenshot, the trainer’s outfit is a kind of romper where the top part looks like a t-shirt and the bottom half is shorts; the seam between the two is directly under the bust. So for the top or “shirt” half, I turned to my copy of the Kitschy Coo Lady Skater Dress and a very stretchy medium-weight white polyester/spandex dancewear fabric that’s beefy enough to be opaque. For the bottom or “shorts” half, I grabbed Simplicity 1072 View A, a pair of straight-legged knit pants with crotch and side seams, and a heavy-weight quilted scuba knit in the perfect shade of boysenberry. (Thank you, Camille, for explaining the difference between scuba and neoprene!)

My approach—and it may not have been the best one, but it’s the one that made the most sense to me at the time—was to blend the two patterns together at the waist and then cut them apart again below the bust. It went something like this:

  1. Ditch the waistband from the pants.
  2. Determine how long to make the inseam of the shorts and cut off the excess (doing this now makes the piece easier to deal with).
  3. Take the top, which is designed to be cut on the fold, and add a seam allowance to the foldline equal to the seam allowance at the crotch.
  4. Blend the top and bottom together at the waist to create one piece. The CF is straight and parallel to the grain; the side seams have a pronounced curve.
  5. Cut the piece apart under the bust and add seam allowances at the new seam line.
  6. Eliminate the CF seam allowance from the top, allowing it to be cut on the fold as originally intended.

I figured that by doing it this way, I ensured that all of the seam lines would meet where they needed to, and I achieved the look I wanted, which was to have a CF/CB seams on the shorts but not the shirt.

I repeated this process on both the front and back pieces. To get what I hoped would be a dramatic curve from the natural waist out to the hips, I blended from my actual waist size out to the largest hip size. Despite adding about 5 inches of positive ease, the romper pulls across the hips. I suspect it’s the result of the shape and depth of the crotch curve and the fact that the CF and CB seams are straight, even though like most humans my profile is more kidney bean-shaped than rectangular.

The M7556 pattern is designed with a back zipper, but since my romper’s CB seam doesn’t go all the way to neck, I had to move the zipper to the side seam. I chose to put it on the right side instead of the left, even though custom dictates that it belongs on the left, because I don’t think it’s practical or comfortable to try to reach around my own body to do up a zip, and I refuse to slavishly follow a tradition that ceased making sense at least 100 years ago. My clothes, my way.

The decision to add pockets was a no-brainer—where else would I put my phone while in costume and on the hunt for rare Pokémon? I borrowed the pocket pieces from some dress pattern or other. I’d never worked with both an invisible side zipper and pockets before, and I relied on a StyleArc tutorial for assembly instructions.

Sadly, when I tried on the romper after the zipper insertion, I couldn’t actually get the slider past my waist, no matter how much I sucked in and pulled. Eventually I admitted that an invisible zipper was not sturdy enough for such a heavy fabric, and I ripped it out and replaced it with an all-purpose (i.e. polyester, non-separating, non-invisible) zipper. Fortunately, it’s a pretty good color match, because there’s really no good way to insert a regular zipper into a side seam, especially not when you throw a pocket into the mix, and my wobbly seam stitching means that the serging I did to finish the raw edges is visible above the pocket.

In order to make the side zipper more functional, I also left the right shoulder seam open, finished the edges by turning them under once and stitching down, and adding four sew-in snaps. I normally sew knit bands in the round for a cleaner finish, and that’s what I did on the neck and the left armhole, but because the right armhole was broken up by both the zipper and the snaps, I split the band into equal two pieces and sewed them in flat. All of the bands were attached on the inside, turned completely to the outside, folded under, and topstitched down with a twin needle—I used Sewaholic’s Dunbar Top knit binding tutorial for reference, though my binding is nowhere near as neatly done.

For the decorative appliqué on the front of the shorts, I drew the shape I wanted on tracing paper, then cut it out of the same the material as the top. Because of the complex shape and narrowness of the pieces, as well as the fact that the fabric is a knit, I didn’t bother with finishing the edges once cut. Instead I positioned them on the front romper pieces (before I sewed up the side seams) using Steam-A-Seam 2, pressed them with a steamy iron and a press cloth to fuse them on, and then stitched over the edges all the way around using a short, wide zig-zag.

For the trim on the legs of the shorts, I cut rectangular bands 10% shorter than the circumference of the opening, applied them in the round, and then topstitched the seams down using a twin needle so the bands wouldn’t flip up and the seams wouldn’t flip out.

The jacket was much, much more straight forward to construct. I chose View A, which has a neckband instead of a hood. I used a plain sweatshirt fleece for the body, sleeves, and sleeve accents, and a cotton/spandex rib knit for the cuffs and bands. To match the color between the body and bands, I dyed a portion of each fabric using Rit DyeMore in Apricot Orange, following the instructions printed on the bottle. Although the sweatshirt knit has a much higher synthetic content than the rib knit, I dyed them in the same pot for the same length of time, and I’m pleased with how closely they match. I will warn you, though, that even after washing and drying both pieces of fabric separately before assembling and wearing the costume, the body of the jacket transferred dye to the white part of the romper. It seems to have happened primarily under the arms and around the neckline, two areas where there was probably a bit more friction and moisture.

I made the jacket in size 10, and the only alteration I made was to shorten the sleeves from full-length to three-quarter-length. I should have sized up to a 12, because I forgot that even though sweatshirt fleece is technically a knit it doesn’t really stretch. As a result the jacket is quite snug in the bust, and it’s difficult to bend my arms, but it’s not unwearable.

The one thins I really don’t like is the zipper treatment. The pattern calls for a 12″ separating zipper, which is the shortest I could find at my local JoAnn’s, but the front opening on at least the smallest two sizes is shorter than that, even with the bands. You’re instructed to handle the excess by folding it over and tacking it down, with a strict admonition not to cut through the teeth to shorten it. Afraid that I’d ruin the zipper and therefore the jacket, I followed these instructions as well as I could without putting in any stitches that can be seen from the outside, and (somewhat predictably, in hindsight) the ends don’t stay put and want to peek out at the top, especially since I was wearing the jacket partially unzipped.

I’ve since learned that you absolutely can shorten a separating zipper, so don’t be afraid to do that! Also, plan to interface the front edges where the zipper attaches. It’s on oft-omitted step that keeps the edges from buckling/rippling, particularly when there’s a bit of strain. I didn’t do that on either the jacket or the romper, and now wish that I had.

To wrap up, let’s quickly touch on the accessories. The leggings are me-made but unblogged, because black cotton/spandex one-pattern-piece leggings are *the* most boring thing. The shoes are plain canvas sneakers that I intended to embellish with orange ribbon. My gloves, like Justin’s, are a cheap, plain pair that I cut the fingers off of and then melted the openings of to prevent fraying, also destined to have some ribbon trim. The choker is an orange ribbon with rare earth magnets Gorilla-glued to the ends; I would have folded the ends over and stitched the magnets into little pockets, but the ribbon wasn’t wide enough and I ran out of time to find a better solution.

The hat is a plain black ball cap that had red and white Pokéball pieces cut from craft foam attached to it with double-sided tape, but by the time of this photo shoot they would no longer stay stuck. In my fantasies I’d cut pieces from the remaining scuba knit I used for the romper and sew them to the sides and back of the hat, appliqué or embroider a Pokéball to a white fabric and stitch that to the front, then trim the whole thing in more orange ribbon.

I guess what I’m saying here is that ribbon expectations > ribbon execution. I also had plans for a belt and buckle that completely failed to materialize. Still, I think the spirit of the costume shines through clearly, even if a lot of the details are unfinished, missing, or don’t hold up to close inspection. In the end, Justin and all of our trick-or-treaters loved the Pokémon theme, so I’d say that it was worth it.

If anyone has any specific questions about the design or construction, I’d be happy to answer them!

FO: Ash Ketchum

For Halloween, Justin and I like to choose a specific theme rather than going with broadly scary. In past years we’ve dressed as Alice and the Mad Hatter, Sora and Kairi from Kingdom Hearts, Agent Coulson and Agent Hill from The Avengers, and Bill and Zoe as part of an awesome from Left 4 Dead group costume. In 2016, as I was thinking back to movies and games we’d enjoyed over the previous 12 months, I decided that it would be fun to do Star Wars: The Force Awakens. I was keen on being Rey, but Justin wasn’t really feeling either Finn or Poe, and I have to admit that putting together either of those costumes would have been a lot more challenging than I was ready or willing to tackle. So after tossing out a few other ideas, Justin suggested Pokémon. He watched the show a lot as a kid, Pokémon GO was tricking motivating him to exercise more than any other activity, and it would be instantly recognizable, so he was heavily invested in the idea. I figured there were plenty of costume opportunities, so I said yes.

Justin decided to be Ash Ketchum, the hero of the story and easily one of the most recognizable characters after his Pokémon companion Pikachu. Ash’s outfit is simple, so I chose to start with it to warm up for more involved sewing. I looked for the simplest men’s button-up pattern I could find, one with short sleeves and a plain (not notched) collar and without a yoke, pleats, or collar stand, and I came up with Simplicity 8180. I cut View B in size XL but straightened the bottom hem, borrowed the collar from View A, and omitted the pocket and buttons. I also added a center back seam to mimic the character design from the show. I cut the two back pieces to include the selvage so I wouldn’t have to finish the edges—the first time I’ve tried this shortcut—and I rather like it. While it’s not the most impressive finish, it’s perfectly suitable for this kind of project, and gives you the peace of mind that the edges of the fabric won’t fray to bits while you’re handling everything.

The pattern bills itself as a 3 hour™ design (sewing time only, they are hasty to clarify on the envelope), and at the outset I would have agreed. However, when I reached the instructions for the collar—which come quite early in the assembly process—I found myself confused and uncertain. Now, I confess that I’ve not sewn a man’s shirt before, so collar construction is new territory for me, but these instructions do the sewist no favors. For example, they tell you to apply interfacing to one of the two identical collar pieces, do a bit of stitching and clipping, and then sew the facing to the collar. But they never identify which piece is the facing and which is the collar, and this matters, because your next steps involve pressing the facing and seam away from the collar and understitching. If you don’t know which piece is which, how are you supposed to know which way to press and which piece to understitch? I certainly didn’t.

I spent a not-inconsiderable amount of time trying to follow the diagrams and mentally (and physically) manipulate the pieces to figure out the correct answer, then hazarded a guess that the piece with the interfacing applied to it was the facing—a reasonable assumption, wouldn’t you agree?—and quickly discovered that this is not the case. I was able to unpick and re-sew without needing to cut new pieces, but it was a time-consuming stumble that could have been avoided with a single line, or maybe even just a few words, of additional explanation.

Fortunately, the collar came out looking pretty good anway, although I wish I’d remembered to stitch across the corners rather than pivoting at the corners to get a sharper point (a tip that I think I first saw on Melly Sews).

I didn’t particularly like the way attaching and finishing the collar intersects with sewing the facings for the front opening. It was bulky, awkward, and I feel like there are raw edges lurking just in the wings, waiting to pop free and unravel. I suppose the construction is probably due to the lack of collar stand, but surely there must have been a better way? It makes me want to sew a proper man’s shirt with stands and plackets and no raw edges in sight.

For the front opening, I subtracted width from the front shirt pieces and the facings to meet in the middle instead of overlapping. I interfaced the facings according to the instructions, and I pinked the free edge before folding under and stitching.

For the snap, I simply drew a square extension with seam allowances on the right front and right front facing to accommodate a Size 24 heavy-duty brass snap. I installed the snap using a basic snap setting kit and hammer. Although cutting into the finished shirt made me anxious, hammering in the snap pieces was great fun and very satisfying—I heartily recommend it.

In hindsight, I wish I’d further reinforced the snap tab with an additional layer or two of interfacing. I fastened the snap one time to make sure it worked, and was a little afraid that I’d tear the fabric before I could separate the halves again. Luckily, Ash always wears his shirt open, so the snap doesn’t really need to be functional. (But it did need to be a snap, not a decorative button. I was adamant about that, much to Justin’s amusement.)

The bottom edge of the shirt is finished with self-made bias tape. In order to effectively conceal all of the raw edges and not cause issues with the front facings laying flat on the inside, I treated it like a reverse bias facing, attaching it to the inside and then turning the bias tape and the raw edges to the outside, machine stitching it down, and polishing it off with a bit of hand stitching where needed. Up close, the yellow fabric is a bit sheer and the raw edges are visible through it, but at a distance it’s unnoticeable. The faux pockets were made by stitching down strips of the same self-made bias tape.

Some final notes on the shirt:

  • The instructions don’t call for it, but I flat-felled the shoulder, sleeve, and side seams because I’d never done it before and I wanted to try something new. I like having another seam finishing technique in my kit, and I look forward to applying it to future projects.
  • The sleeves are a standard set-in style that requires easing, but not an excessive amount. There’s a pattern piece so that you can bias bind the seam allowances, but this seemed unnecessary; I serged them instead.
  • The blue fabric for the shirt is a Kona cotton; the white fabric for the sleeves is a mystery flat-weave cotton (purchased broadcloth? recycled bedsheet? who knows); the yellow fabric for the bias tape is a cotton broadcloth.

I’m quite pleased with the finished shirt—it looks exactly like Ash’s from the original show—but I cannot recommend the pattern I used. In addition to the issues with the collar, the instructions never actually tell you to sew the front and back pieces together at the shoulder seams before instructing you to attach the collar and front facings. While it’s not impossible to figure this step out—those seams are clearly sewn in the illustration for attaching the facings—it reinforces the impression of a lack of attention to detail in the instructions. Perhaps the pattern writers, pressed for space as I’m sure they were, were streamlining the instructions and removed a line by accident. But if space was at such a premium I think I would have nixed the boxer short pattern, which to my mind doesn’t make a lot of sense with a shirt and tie pattern anyway, in favor of more thorough shirt instructions. In the future, I think I’ll use a pattern like the Fairfield button-up from Thread Theory, even if it means I need to eliminate stands, yokes, and/or pleats myself to get the styles lines I want.

As for the rest of the costume, the jeans, t-shirt, and belt are, not surprisingly, things that were already in Justin’s closet. The gloves were a convenient $3 find in the checkout line during one of my many (many) trips to JoAnn; I cut off the fingers cut and melted the openings with a lighter to prevent unraveling. The soft foam Pokéball came in a three-pack from Toys-R-Us.

Ash’s hat is entirely Justin’s handiwork. After I failed to order a hat in time for Justin’s office dress up day, Justin took matters into his own hands and downloaded a free ball cap pattern. What I didn’t realize was that he grabbed the first pattern he could find, which happened to be designed to make paper hats for beer bottles. So, itty-bitty. With my help, he was able to scale it up to human head size, and then to his head size, which is about two inches larger than average. He cut the pieces out of craft foam and glued them together, and then cut out the symbol and attached it with double-sided tape. I wanted to butt the cap seams together and stitch them up on my sewing machine, but we were tackling this project in the hour before we both had to work, so that didn’t happen. He didn’t mind though. Turns out craft foam doesn’t breathe at all so that gaps provided some much-needed ventilation.

Justin was over the moon about his costume, and with the positive response he got from everyone at work and who visited us on Halloween. If you want proof, here he is showing off in between handing out candy to trick-or-treaters:

Next up, my Pokémon GO trainer costume!

The Only Way Out Is Through

As the parade of year-end wrap-ups has streamed through my feed this week, I’ve felt a mounting pressure to sit down and compose my own thoughts. This pressure stems not from a desire to emulate or perform for others, but from a very real need to confront my own experiences and realizations from the last 12 months. I have a much different perspective than I’d hoped to have, and I want to acknowledge and explore the gap between expectations and reality.

That I’m able to write at all is due in no small part to my thoughtful husband, who gifted me with a tablet this year for Christmas. My desktop computer suffered a motherboard failure just after Thanksgiving, and in the flurry of end-of-year work deadlines, Christmas hosting preparations, and holiday spending, I had neither the time to research nor the ready funds to purchase a replacement board. All of my recent outfit photos had been transferred from phone to hard drive just before the failure, so they have been held hostage by the broken component.

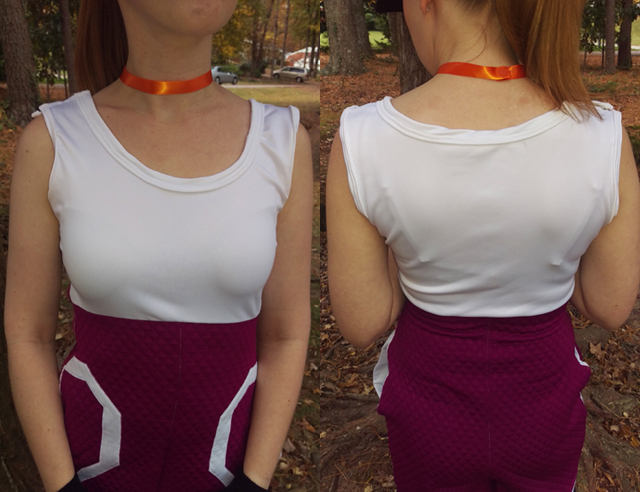
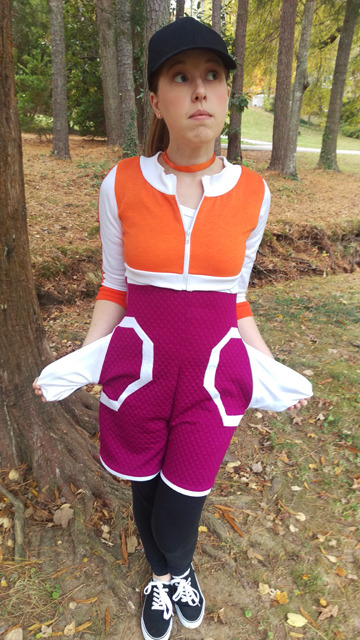
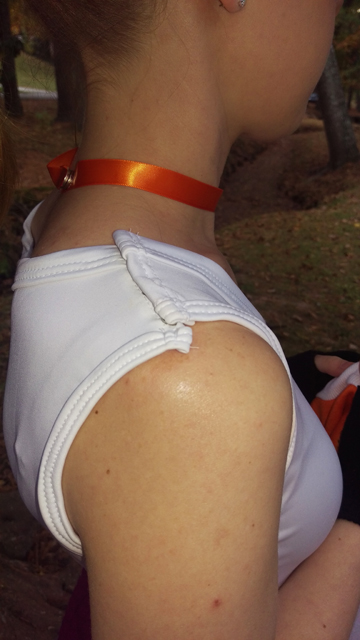
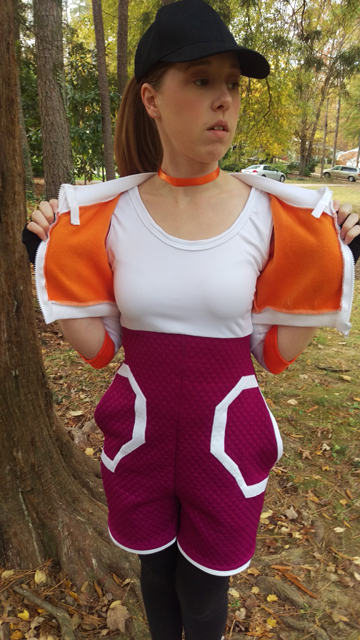
I’m thankful that a new motherboard is, as of today, on its way to me, but the delay means that there’s no chance at all of posting our Halloween costumes or the dress I made for my work Christmas party before the year is out. I haven’t decided yet whether it’s worthwhile to post them so long after the fact, or if I’d rather move on to new projects and new topics. Only the new year will tell, I suppose.

Those three missing posts mean that there is very little in the way of finished garments to recap. But even if I’d been able to include them, I’m well aware that my output this year has been disappointing. While others can count their successes in the dozens or scores, I have fewer than ten, and the amount of wear that any of them have gotten is extremely limited. In fact, shortly after finishing all of the athletic wear, I stopped going to the gym completely and haven’t been back since. I wish I could say that this is the result of an unfortunate injury that needed recovery or a positive lifestyle change that eliminated the need for scheduled exercise, but the fact is it’s all down to a short period of stress followed by laziness and finally inertia.

Knitting has not escaped this stagnation, either. This has been my least productive year in the short time since I started knitting. The striped sweater I started a year ago remains unfinished, awaiting a time when I have the mental fortitude to rip out and re-knit both sleeve caps, then finally sew the thing up, knit on the neckband, and weave in the ends. A scarf that I allowed myself to start to alleviate the tedium of the sweater and to provide a bit of mindless, portable knitting needs no more than a bind off and a few ends woven in, and yet it languishes in a bag. I even permitted myself to buy two skeins of yarn for easy hats in a desperate bid to kickstart my knitting enthusiasm, but I never made it further than winding them into cakes.

Needless to say, I did not sew or knit more this year. While I did read through all of The Modern Natural Dyer, the only dyeing I actually did involved a bottle of RIT. We made a tiny bit of headway on fixing up our guest room, but nothing worth writing about or photographing. As for a dedicated sewing space, I consolidated all of my fabrics, tools, and notions in a corner of the living room, which was hardly the plan, but is an acceptable temporary arrangement while I continue to use the dining room table to cut and sew on.

In short, I did not reach any of my goals for 2016. Not even close.

I’m hardly the only one, of course. But I seem unable to brush it off, like Kat, who doesn’t believe in failure as a concept; or even take pride in how I’ve flouted my goals, like Tassadit, who clearly knows how to prioritize joy over success. It’s not in my nature to pretend that I believe that it’s all been “a learning experience,” because in truth my first reaction to defeat is not optimism, it’s disappointment and sadness. So instead of putting on a falsely brave front, I’m going to take a cue from a recent post by Klara from A Robot Heart—who feels like a kindred spirit, half a world away—and delve into why it’s been so difficult to reflect on my year and shine a light in places that often remain dark.

It’s about more than completed and incomplete tasks.

On the surface of it, I love making lists, and I find satisfaction in checking things off. An unfinished to-do list would obviously be a source of dissatisfaction. But if it were truly that simple, if all that mattered was getting things done eventually, then all I’d need to do is deem all of those 2016 goals ongoing, and carry on into 2017 striving toward the same things. No reason to set an arbitrary deadline—or even an arbitrary check-in point—if all it does is cause unhappiness, right?

The trouble is, I crave organization because I need it to think clearly, act confidently, and feel at peace. Because despite being the kind of person who loathes idleness, when I’m presented with a variety of activities to choose from, I don’t tend to feel excitement at the many possibilities, I tend to feel anxiety. I’m liable to become overwhelmed and shut down completely, because I a) want to do everything at once, b) know that that’s impossible, and c) no longer have a reliable sense of what will make me happy in the moment.

So I make lists, because it allows me to prepare, to plan in advance, when emotions aren’t high and I can be more certain of knowing my own mind. Then I not only get the satisfaction of the thing itself, but also the reassurance that I’m doing something I know is important to me in some way.

Looking back, each unaccomplished goal represents hours spent agonizing over what to do in the evening or on a weekend. Too often, instead of working toward the things I had determined were important to me, I retreated into reading forum discussions, or distracted myself with some insignificant task, or sat paralyzed until Justin proposed some other thing to do. How many Friday nights did I fret about spending my weekend wisely? How many Sunday nights did I despair about going back to work, feeling like I’d squandered my time and would have to slog through five more days to try again? Far too many, I’m afraid.

The experience of correcting mistakes is a poor teacher for coping with failures.

Like many makers, I turn to the creative community when I need guidance—not just for sewing or knitting techniques, but for conscious consumerism, for body positivity and self-love, and for any number of other topics. Makers are no strangers to adversity, and it’s cheering to read about others’ struggles and how they’ve overcome them.

But as I’ve been thinking about my failed goals, I can think of many bloggers who have shared their mistakes, but I’m struggling to bring to mind bloggers who have shared their failures. What I mean is, I can think of countless posts describing a project that disappointed due to a mismatch of pattern to material, or an outfit that was never worn because of unacceptable fit, and even garments that were thrown away—all things I would consider mistakes, things where you think “That was a shame; I’ll try to do better next time.” But failures, like investing a lot of time, money, and effort into a hobby that you ultimately abandon? Or committing to a project for someone else, as a gift or perhaps as a commission, and then being unable to see it through to the end? Or chasing a creative dream that doesn’t pan out and having to give it up? Basically, anything where there may not be a “next time”? Not so much.

Now, I understand that no one likes to dwell on these embarrassing and costly experiences, let alone broadcast them to others, so I’m not really faulting anyone for not posting about them excruciating detail. And I certainly don’t want to equate my own shortcomings with more serious troubles.

But I fear what gets lost is an honest look at the invisible costs of these failures. It’s more than just a wadder, a project that you looked forward to that you don’t get to enjoy. There’s lost money, sure, and there’s lost time. Deeper still, there’s a loss of confidence, a reluctance to try again, a fear of failure. Why set a new goal? You failed at the last one—what makes you think you’ll succeed at this new one? You start to wonder if maybe you’re not cut out for these goals, if they’re really worth it, if working toward them even makes you happy. That’s a lot of baggage to carry forward. It doesn’t necessarily vanish with the next success. I’d dearly love to know how others manage it.

There is an even greater enemy than envy.

What’s thrown all of these feelings into sharp relief is seeing other bloggers reach for and achieve success this year. Reading about Helen’s journey as she blogged one make a week, designed two patterns, and grew her following to the hundreds in just one year, following along as Madalynne has teamed up with Urban Outfitters, Simplicity, and Pfaff to live her lingerie dreams, and watching as Allie has written tutorials, filmed a class, and garnered sponsorships, have been hard. I don’t resent their successes—far from it! I think that they’re amazing women who have worked hard and earned every good thing that has come their way. We’re so fortunate to have them in our community, and I admire each of them for their discipline, tenacity, and generosity of spirit.

When I look at these women, what I feel isn’t envy. It’s regret. They set goals for themselves; they worked hard; they succeeded. They achieved goals that I had for myself (whether I’d publicly stated them or not), and goals that I’d hoped to work toward in subsequent years, building on the foundation of this one. They didn’t fall into these successes by hazard or happenstance; they are not possessed of fabulous wealth, unlimited free time, or preternatural abilities.They earned these successes. And I could have earned them too, had I really tried.

The hardest thing to face is the realization that I did not become a better version of myself.

I have not achieved the goals that I identified as important to me. I have not been making choices to shape my life according to my own self-professed values. These were not mere mistakes, things that I can easily learn from and apply to future situations. These were failures. This is time that I cannot get back, and I regret that I used it so poorly.

That’s rather a grim place to end, I know, but there’s nothing to be gained by dishonesty, and nothing to say at all if I can only talk about what’s happy, easy, neat. Maybe I can open up the conversation about failure and disappointment. Or maybe mine is just another sad closing chapter for the year, and that like so many others I’ll be glad to put 2016 behind me and never look back.

In any case, may we all find the strength, wisdom, and grace to grow in 2017.