The Great Paper Purge, Part 1

How much paper do you keep at home? Do you diligently recycle flyers and shred credit offers, or do you find receipts constantly piling up on end tables, nightstands, and the kitchen counter? Do you keep just seven years of personal tax documents, destroying the oldest return each year after you file a new one, or do you still have pay stubs and W-2s from a part-time college job almost 10 years ago? Do you keep a log of car maintenance, or do you rely on a heap of invoices from every oil change and tire replacement to keep track of what you’ve done and what you haven’t?

Since I’m writing about it, you can probably guess which boat I’m in. I’ve got it all. I have pounds of paper of every conceivable kind. Fortunately, I haven’t had too much trouble keeping it organized: most of it is neatly sorted into labeled hanging file folders, although some of it inevitably collects on clipboards and in baskets around the apartment. Unfortunately, I’ve taken an overly zealous approach to saving things since I moved out and got married in 2009, which means I have whole folders full of papers that I don’t really need to keep.

Then about a month ago, I started a new job and got my own office for the first time in my working life. I was told that it had been cleaned out before I arrived, but I quickly discovered that this was not the case. The woman I inherited it from, who had been with the company about 10 years and quit a couple months before I came on, had an attachment to paper records coupled with a complete lack of an organizational system. I spent the first two weeks just wading through shelves and drawers jammed full of manila folders, opened envelopes, and scraps with notes written on them. (I also found personal items like nail files, open packets of water flavoring, and partially used lip gloss and perfume—eww!—but that’s neither here nor there.)

Attempting to sort through someone else’s work clutter and general detritus cast my own paper situation in stark relief. Faced with a mountain of paper—some of it half a decade old—it’s hard to know what, if anything, is important. I realized as I never had before that the longer I wait to do it, the longer and more unpleasant it will be to do. Plus, I’m not planning to live in this apartment forever, so at the very least I’d like to avoid hauling around unnecessary documents (again). Paper’s heavy!

Breaking the project down into more manageable tasks helped, and I accomplished a lot in a couple of hours the course of a week. Here are the steps I took:

1. Find a large, clear surface and round up documents. When I want to spread out, I prefer to work on the floor, but if your dining table or desk is large enough and clean enough, more power to you! You could even use your bed, as long as it’s made. If you keep things in a stationary file cabinet, it’s probably easiest to stay in whatever room is closest to it. Once you’ve got a safe place to make a mess, grab the accordion folder, banker’s box, or hanging files that keep your important papers, then gather any unsorted mail, notes posted on the fridge, and scrap papers on the desk.

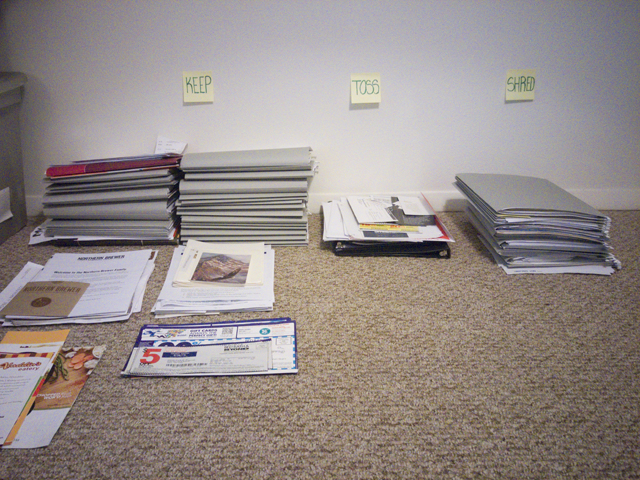
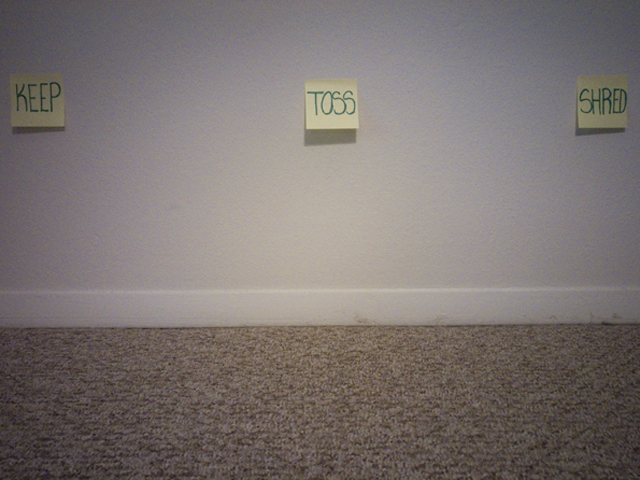
2. Designate three piles: keep, shred, and toss.

2015-07-20_01_Keep-Toss-Shred-Setup

I labeled my piles, because I wanted to be 100% certain I didn’t lose track of which pile was which halfway through the exercise, especially if I got interrupted unexpectedly; you’re not obligated to stick Post-It notes to your wall like I did.

Individual papers went into the keep pile if I definitely needed to keep them; folders went into the keep pile if I knew or suspected there was at least one important paper in them. When in doubt, send it to the keep pile—you can (and probably should) do a second review, so putting it here doesn’t mean you’ve absolutely committed to keeping something for ever and ever. Sensitive documents that I didn’t need to keep went into the shred pile; non-sensitive documents went into the toss pile.

Not sure what you should keep and what you should dispose of? Me neither. That’s how I ended up in this situation. Lucky for you and me, Consumer Reports has a handy guide for what documents to keep and how long to keep them, the IRS has a guide for how long to keep tax documents, and House Logic has a more detailed rundown tax- and investment-related documents you’ll want to keep, for how long, and why you might need them. Don’t forget to check with your bank/credit union, insurance carriers, etc. for more specific information, as their requirements may differ from the general guidelines provided elsewhere.

Once I had permission to get rid of things, this…

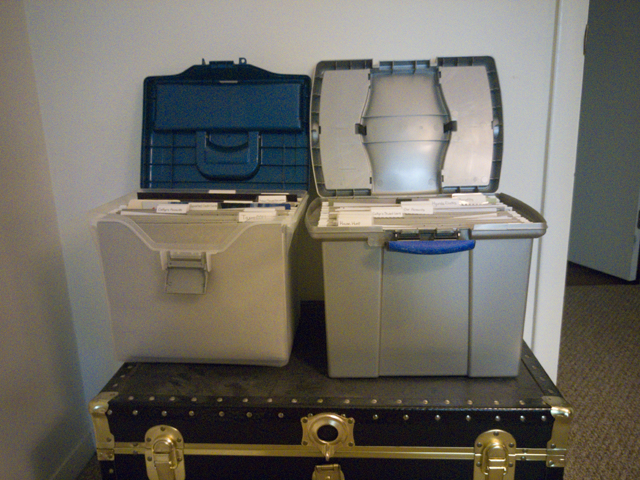
2015-07-20_02_File-System-Before

…quickly turned into this:

2015-07-20_03_Sorting-in-Progress

3. Recycle the toss pile, and savor a little (or a lot) of shredding. A couple of years ago we bought a seven-sheet cross-cut shredder designed for home use for about $40, and we don’t regret the expense. It shreds plastic cards and staples no problem, which is a nice plus (and pretty common in consumer shredders these days). The shredder can overheat if used for a large amount of shredding at once, but shredding in smaller batches with short breaks in-between helps, and letting the device rest for 30 minutes if it stops working always solves the problem. If you don’t have a shredder, find out if your workplace, your bank, or your city has shredding events. While not as convenient as home shredding, they usually have only have minimal requirements (like how much each person can drop off or how it should be delivered) and they’re often free.

I’m going to be 100% honest: I optimistically thought that I could knock out this task in an evening or two of dedicated shredding. I grossly underestimated how much there was to do and overestimated how sturdy our little shredder is. Don’t get me wrong, it fought like a champ. But I tripped the circuit on the motor every single time I sat down to shred. The task definitely dragged on, but I kept reminding myself how much easier it would be moving forward if I created a streamlined system once and for all.

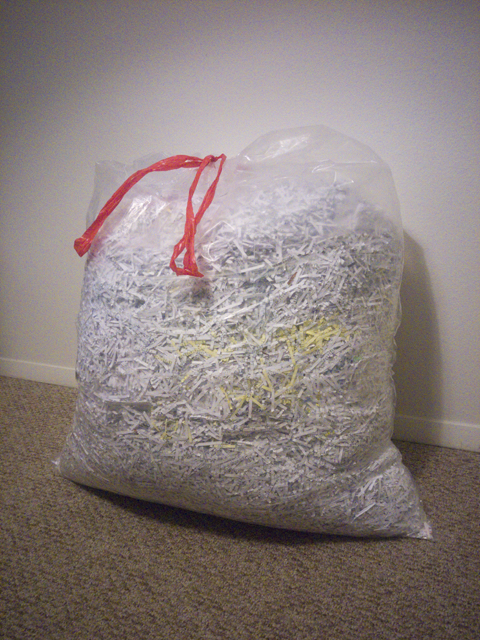
In case you think your own paper Everest is insurmountable, or you just want the satisfaction of knowing that there’s someone out there as badly off—or worse—than you, let me present my own wood pulp behemoth:

2015-07-20_04_Shredding-After

That’s not a kitchen trash bag; that’s a lawn-and-leaf bag. It weighs 13 pounds. It doesn’t even include the stacks and stacks of things that went straight into the recycling bin.

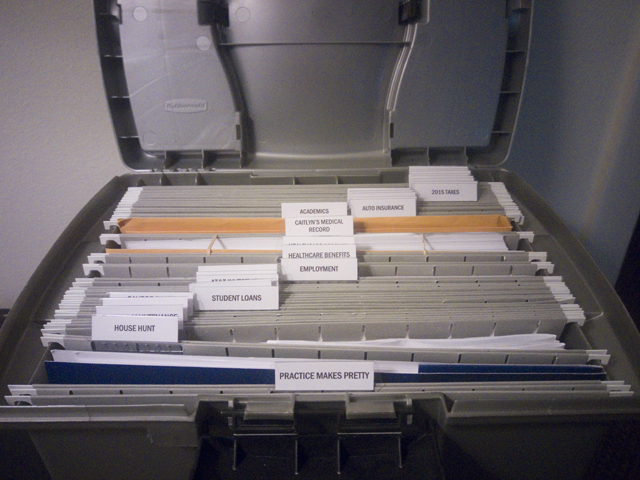
4. Organize what’s left. Actually, pat yourself on the back first, because at this point you definitely deserve it. Then, take a look at what you’ve decided to save, and assess whether your current storage solution is working. I had no complaints with my hanging file folders inside a portable plastic file box, so I decided to stick with them. You might decide that you’d rather switch to an accordion file, a filing cabinet, or some other solution. You might consider re-purposing an unused or under-used storage solution you already have. If you don’t have something like that, now’s the time to make a list of the things you need for your ideal storage system so that you can start shopping around.

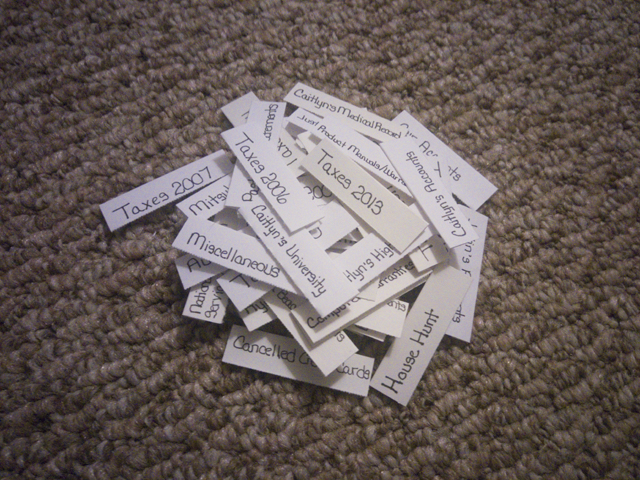
I decided to replace my handwritten labels with nice, neat typed labels. I didn’t do anything fancy like color-code them but you certainly could—maybe as a reminder of how often they need to be cleaned out? I used this opportunity to do a second review of everything, which allowed me to consolidate some files (like all of my academic records) and separate others (vehicle financing and property taxes versus vehicle maintenance records). I was able to shred a couple more small trash cans’ worth of unneeded documents as a result.

2015-07-20_05_Old-Handwritten-Labels

2015-07-20_06_File-System-After

I moved all of our product manuals and warranty documents out of one overstuffed folder and put them into sheet protectors, organized by room, in a three-ring binder designated “home stuff.” It’s not a perfect solution yet, since the sheet protectors aren’t designed for multiple thick booklets and the binder itself is too small, so I’d eventually like to get a beefier binder with envelope-style pockets so that nothing slips out of the top.

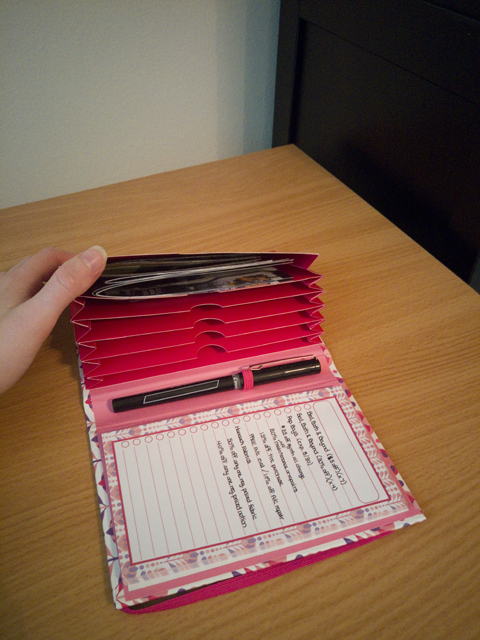
Finally, I stole borrowed a page from Sherry Petersik’s book and bought a little notebook for $5.99 that contains a mini accordion file on one side and a notepad on the other for organizing coupons. I made a list of the coupons I have and their expiration dates before sliding them into the pockets and tossing the whole shebang into my purse. As I use the coupons (or find that they’ve expired) I’ll cross them off the list. If/when I eventually run out of paper, I can just glue in a new pad.

2015-07-20_07_Coupon-Keeper

5. Optional (but highly recommended): Vacuum! Seriously, I did all of my shredding in our office and still ended up tracking little bits of paper all over the place.

When all is said and done, to the casual observer it probably doesn’t look like anything has changed. But after thinking hard about whether I really need each and every sheet, it’s a lot easier to assess my mail and decide what needs to stay permanently, what needs to hang around only temporarily, and what can go straight to the bin. I expect to accumulate paper at a much less alarming rate.

So, are you motivated to clean out your hard copy files? Have any suggestions to make my system even better?

Stash? What Stash?
Two bloggers I follow recently shared mini-tours of their sewing rooms, and another I’m familiar with was featured on Design*Sponge for her sewing nook makeover, all of which reminded me that I am incredibly fortunate to have a spacious apartment with enough room to dedicate to sewing and other crafts. Not only that, but the sunroom is, true to its name, the only room in our apartment that gets any light, and it’s got rather a nice view of the woods behind our building. Unfortunately, it’s severely lacking in the furniture department, which means that for now it’s mostly just a storage corner.

But storage for what, exactly? As a self-proclaimed non-stasher, I shouldn’t have all much beyond my sewing machine and serger, swift and ballwinder, and assorted small tools and notions. Once I get a work table or desk to set up my machines, a small bookcase for my reference books and patterns, and a pegboard or hanging rails for things I reach for most, I shouldn’t really need a storage system for fabric and yarn. It’s not as though I have fiber heaped to the rafters; I’m not tripping over boxes or moving things out of the way to get to other things.

But I do have a couple of bins, and I couldn’t stop thinking about dragging them out into the middle of the floor, dumping them out, and sorting through them with a fresh eye. I have a tendency to keep anything that might possibly be useful for something someday (sidebar: as a member of a generation that can talk meaningfully about post-scarcity economics, where does this Depression-era mentality come from? I really want to know) so I wanted to be sure that I hadn’t squirreled things away that I didn’t actually need or want anymore. I’d like to think this is step one on the road to having the sewing room of my dreams: figure out what the sewing room of my reality actually has in it so I can decide how to make it work best for me. The last thing I need is to go out and buy a bunch of totes or shelves or whatever that I don’t actually have a use for. I mean, I love an IKEA trip as much as the next person, but even I have a limit when it comes to shopping for things to put other things in.

Right, back to the stash. Let’s take a look…

2015-03-29_1_Fabric-stash

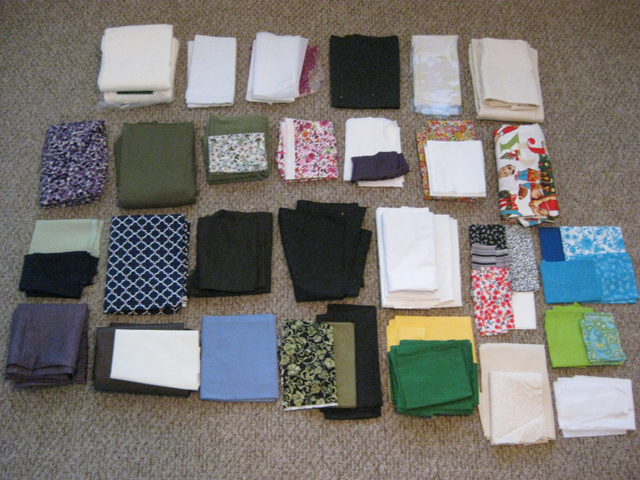
Top row: Utility fabrics (cotton batting, heat-shielding batting, white and black interfacing, clear vinyl, unbleached muslin)
Top-middle row: Apparel fabrics (cotton jersey, drapey cotton blend, brushed cotton twill, polyester charmeuse, rayon bemberg, cotton lawn, novelty cotton)
Bottom-middle row: Craft fabrics (crepe-back satin scraps, quilting cottons)
Bottom row: Craft fabrics (polyester curtain scraps, brown and white vinyl scraps, quilting cottons and bed sheet scraps)

Well then. For someone who doesn’t stash, that’s more than a little bit of fabric. Not a lot, no, and a chunk of it is leftover from completed projects, but there are more than a few pieces of fabric that I had forgotten about buying until I saw them. (I have not yet progressed to the stage where I have acquired fabric with no recollection whatsoever of its origin, thank goodness.) I prefer to buy fabric and yarn with specific projects in mind, because it cuts down on the chance that I won’t have enough material to finish, and because I’m not a designer or improviser, so I don’t really need to have oodles of it on hand for inspiration.

But looking at everything arrayed like this makes me acutely aware of the yardage I bought for specific projects that I never actually started. For instance, I picked up the navy and white quatrefoil with hot pink dots with the goal of making a perfectly fitting pencil skirt with a bit of spunk. Immediately after buying it, I realized that a woven pencil skirt isn’t something I’m likely to wear if given the choice, and that quilting cotton often doesn’t make a very good apparel fabric anyway. Feeling a bit ashamed for making this misstep while buying, I set it aside to “use later,” and promptly forgot about it.

It’s like a sophisticated and stealthy form of self-sabotage and/or denial stashing. If something doesn’t work out, or I think it won’t work out, I set it aside, and then like any other maker I get distracted by my next project idea and off I go. Repeat a few times, and suddenly I’ve grown a stash without realizing it. An accidental stash, if you will.

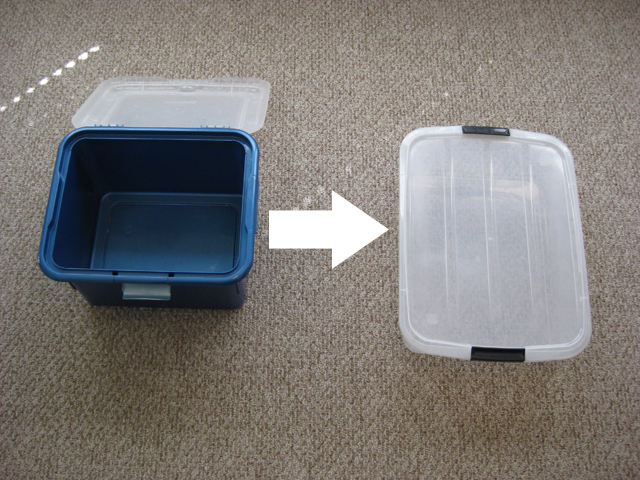
To prevent this from happening again—or at least slow the rate at which it happens—I decided to swap some bins around so that I could move my fabric out of an opaque container and into a transparent one:

2015-03-29_2_Fabric-binsSimple, but effective. It will be a lot harder to forget what I have when I can see most of it at once. Seeing all of it has renewed my interest in many of my original projects, plus sparked ideas for a few new ones. Which leads me to my pattern stash…

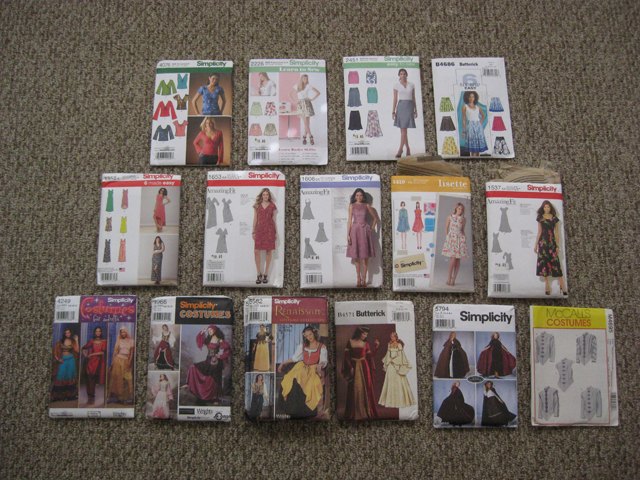
2015-03-29_3_Pattern-stash

This obviously doesn’t include PDF patterns or magazines, though I don’t have many of either. Overall it’s much tamer, but not very practical. Costume patterns take up 40% of my paper pattern collection. (I love costumes, and bought most of them during a sale.) While there’s definitely nothing wrong with having a lot of costume patterns, I only have one “regular” top pattern, and I know already that the Lisette dress pattern is not for me. This is not exactly a firm foundation upon which to build a handmade wardrobe. I’ll definitely be looking for ways to thoughtfully expand this collection to include practical and versatile everyday clothes.

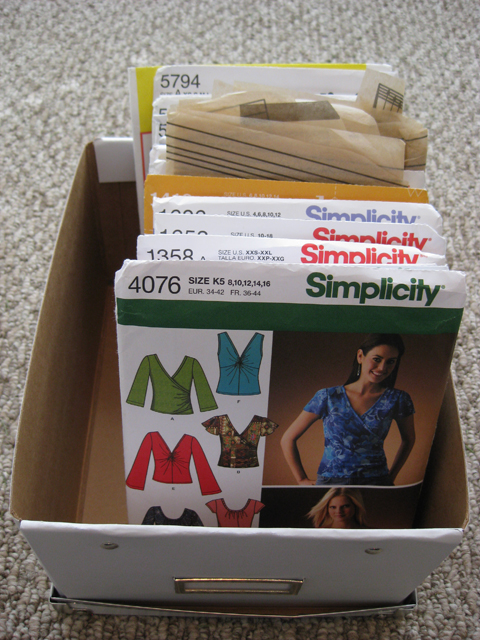
In the meantime, everything will get stowed in a spare IKEA KASSETT box:

2015-03-29_4_Pattern-stash-organized

With all this talk about fabric, let’s not forget about yarn…

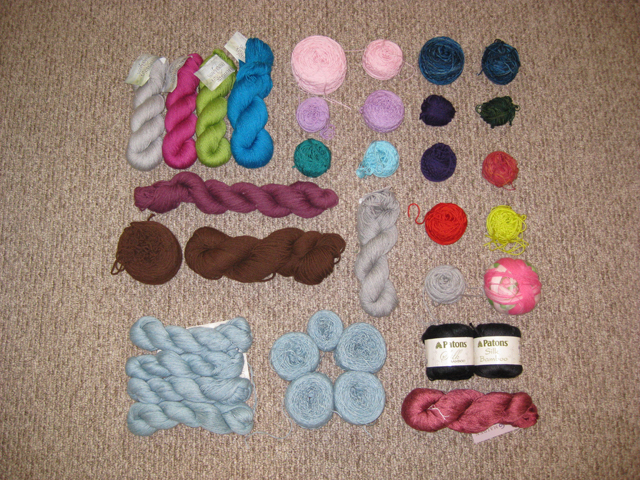
2015-03-29_5_Yarn-stash

Ravelry tells me this totals about 9,020 yards. I pretty much have plans for all of it, I just can’t knit it up fast enough!

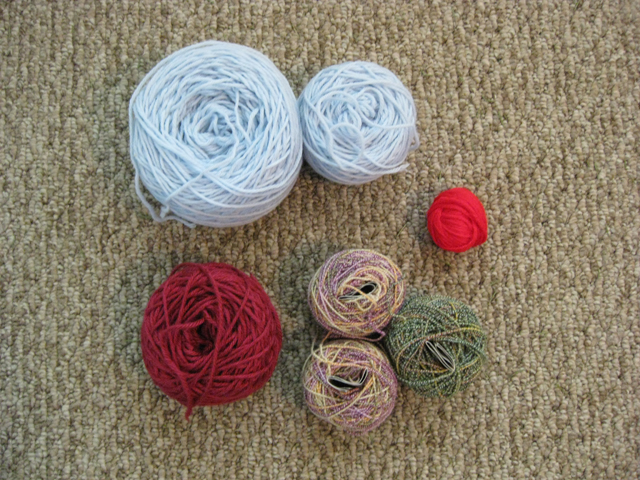
Of course, that’s ignoring a few lingering, unwanted bits and bobs…

2015-03-29_6_Unwanted-yarn

I’ve known for a while that I was never going to use these up, but I’d been at a loss about what to do with them. While I was cleaning out my supplies, I discovered some knitting pattern pamphlets and aluminum DPNs that I knew I would never use (my tastes in patterns and tools have changed since I bought them as a knitter just starting out), all of which fit neatly into a little tote bag I’d sewn up out of remnants that really isn’t my style either. So I packed everything together and have set it aside for a day that I meet a knitter that might want them. It’s not exactly a kit to get someone interested in knitting started—I donated those items to an art co-op before I moved here—but more of a goody bag for anyone who likes string. (This is one of those rare occasions when it would be handy to have friends with kids. Free art supplies!) If I can’t find anyone to take it in the next few weeks, I’ll drop it off at The Scrap Exchange.

Even though it was a bit of a surprise to discover that I’ve accumulated a stash, and even though I didn’t do much to thin it beyond a few odd balls of yarn and a couple of small cuts of fabric, it was deeply satisfying to take stock. Things are in better order, I have plans for my next projects, and I walked away feeling pretty sure that I don’t need to buy any white cotton broadcloth in a while (unless I plan to make curtains or something).

What is the state of your stash? How often do you take stock?

Creating a Pantry

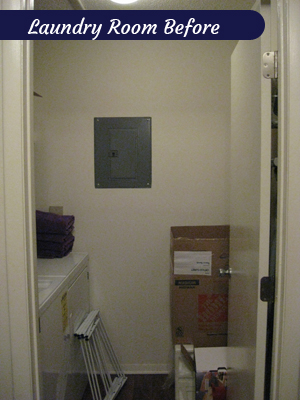
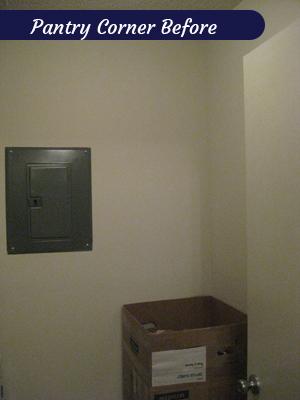
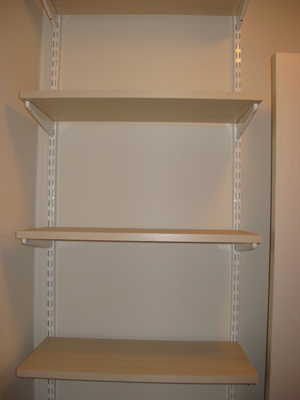
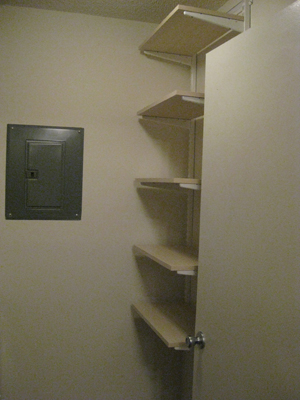
First project of the year completed, and it didn’t even take all weekend! After cleaning out our cart full of non-perishables and placing an order for an elfa system, we were anxious to get the pantry project rolling. Wouldn’t you be, if your laundry closet looked like this?

01_Laundry_Room_Before02_Pantry_Corner_Before

On Saturday I received a text to say that our order was ready for pickup. Even though everything fit easily into a single cart, the associate was kind enough to take it out to our car and load it into our trunk.

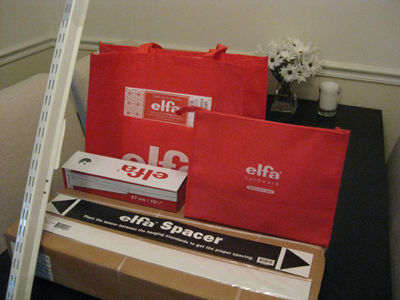
When we got home, we laid everything out on our dining room table.

03_Elfa_Components

The large reusable tote held the shelf brackets, the top track cover, and the smaller red bag. The smaller red bag held all of the hardware, which included drywall anchors with screws, wood screws, and independent shelf pins.

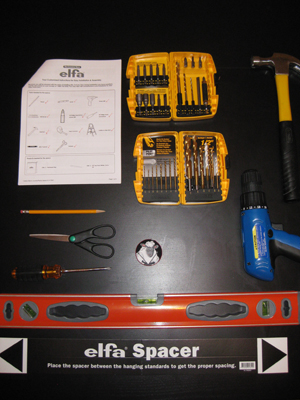
After checking to make sure that everything we’d ordered had made it home—and it had—we cleared the table to make room for all of the required tools.

04_Required Tools

The round thing with a picture of a sheep on it is a tape measure that usually lives in my knitting bag. I couldn’t find our regular metal tape measure, although it ultimately didn’t matter, since we didn’t end up using it for our installation.

We have roughly eight-foot-high ceilings, but we opted to go with a five-foot-high system since we knew we wanted space underneath it for a recycling bin of some kind. We could have gotten one that went floor to ceiling and just chosen not to hang shelves at the bottom, but didn’t see a reason to spend extra money for something we weren’t going to use. (Even if we re-purpose it, I doubt I’ll want to bend over to get things off the lowest shelves and would probably end up putting some kind of box or bin below it anyway.)

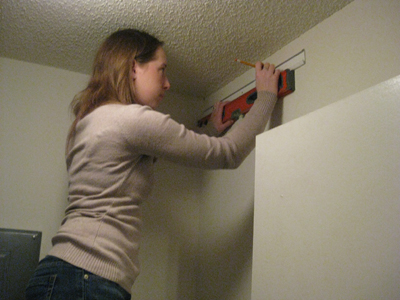
Because we weren’t concerned about fitting the vertical pieces exactly between the floor and the ceiling, and because the popcorn texture makes the ceiling uneven, I moved the top track down a couple of inches from the top of the wall. I also moved it away from the corner of the wall by about a half inch. There was no formula to it, I just eyeballed it and then made sure that the track was level before marking the holes.

05_Leveling_the_Top_Track

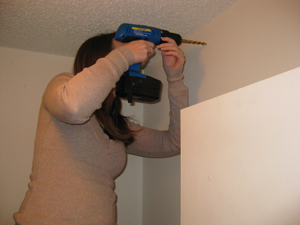
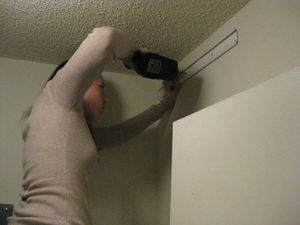
Using the recommended 1/8″ bit, I drilled three pilot holes where I had marked them.

06_Drilling_Pilot_Holes

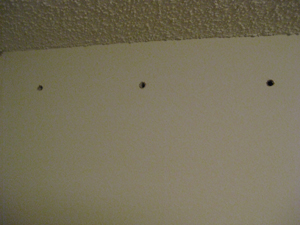
Since I didn’t hit a stud with any of them (something I’d already checked with a stud finder), I enlarged the holes with a 3/8″ bit…

07_Enlarging_Pilot_Holes08_Pilot_Holes

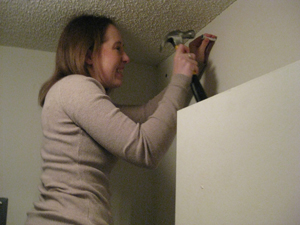
…and tapped in the drywall anchors.

09_Tapping_in_Anchors10_Drywall_Anchors

(I’m laughing here because Justin pointed out that 1) strands of my hair kept getting stuck to the ceiling, and 2) I apparently tend to work with my mouth open, which was making for a lot of funny pictures. About two-thirds of the photos ended up as outtakes, between my dumb faces and crazy hair moments.)

Once I gave up trying not to look goofy, I could concentrate on securing the top track to the wall, starting with the center hole.

11_Securing_Top_Track12_Top_Track_Secured

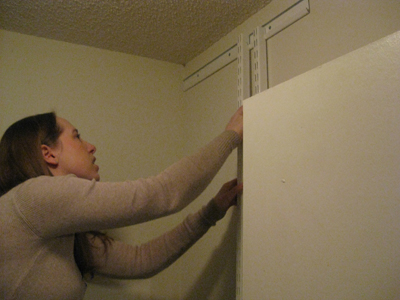
Once the top track was in place, I transitioned from installation to assembly mode. The hanging standards slipped into the top track and the brackets hooked into the standards without any issues.

13_Hanging_Standards14_Brackets

For shelves, we settled on the Sand color, since the laundry room is small and gets no natural light even when the door is open. I don’t mind doing laundry, shopping for groceries, or cooking, but I figure there’s no reason to go out of my way to make the space feel dark, cramped, or uninviting.

15_Shelves

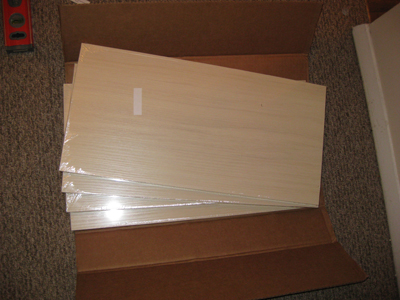
I’d originally planned on four shelves, but only because I completely failed to do basic arithmetic while I was in research mode. When it came time to place the order, we went with five. There are only four in this shot because I was already tearing into the shrink wrap of shelf #1. I may have been cackling gleefully at the time.

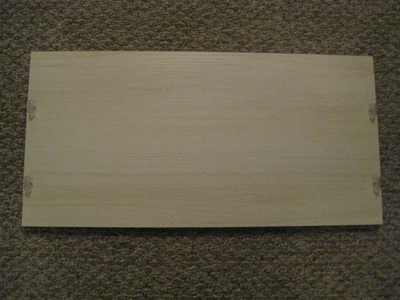
There are three options for securing the shelves to the brackets: wire connectors, independent shelf pins, and screws. Several reviews I saw indicated that the wire connectors felt a little loose and flimsy. Using screws would obviously provide the most security, but since we don’t have kids or live in an earthquake-prone area, it seemed like an unnecessary length to go to, so we chose the independent shelf pins. They’re little wedges of clear plastic on a long peg, with smaller pegs sticking out of the widest part of the wedge at a 90° angle. The long peg is inserted into a pre-drilled hole in the shelf and the wedge fits into the shelf bracket, with a smaller pegs slipping into notches in the bracket to prevent the pins from twisting and the shelf from skewing.

16_Shelf_with_Pins

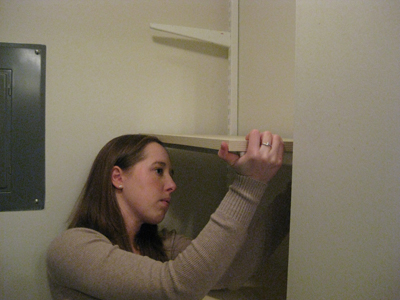
The shelves dropped into place on the brackets easily; a gentle squeeze ensured everything was snuggly in place.

17_Adding_Shelves

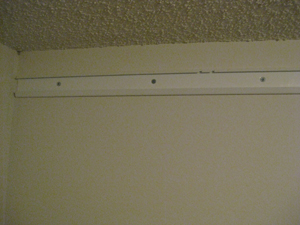
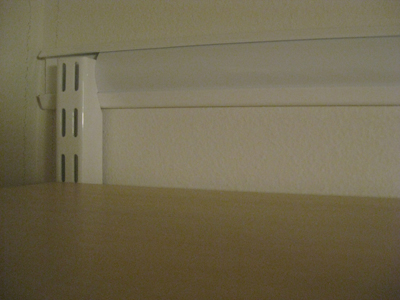
The last step was to cut the top track cover to size with a pair of regular scissors, bend the long edges toward each other slightly to get it to fit under the edges of the top track, and apply gentle pressure until it snapped into place.

18_Top_Track_Cover

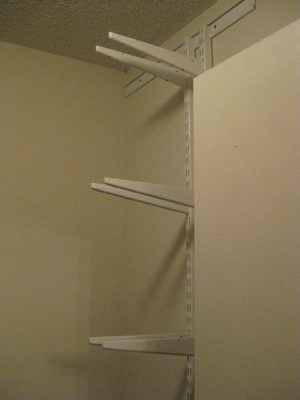
At last, we had a pantry!

19_Finished_Elfa_Front20_Finished_Elfa_Profile

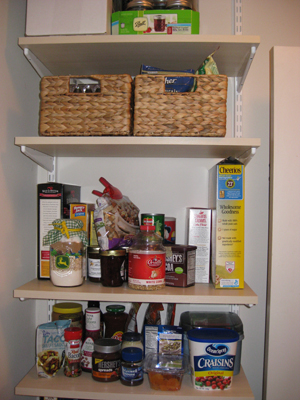
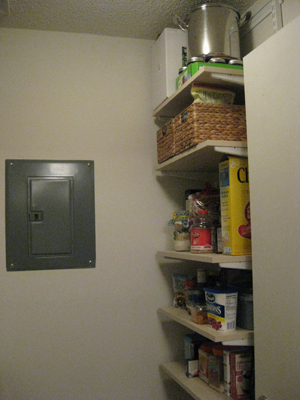
Then came the fun part: filling it up. Even after cleaning out our old cart last week, I still found items that I could consolidate into a single container. Once I started putting things on the shelves, I realized that it made more sense to have them at different heights than to keep them evenly spaced. I grouped the shelves that needed less clearance at the bottom, which put more shelves within my reach (I’m only 5’2″). This gave us enough room on the top shelf to move most of Justin’s beer making kit there; I prefer that to store it next to the cleaning supplies on the other wall.

21_Full_Elfa_Front22_Full_Elfa_Profile

Looking at the pictures, I kind of wish I’d made a gif of the shelves filling up. Live and learn for next time.

Now for my favorite part: the side-by-side comparison of the old, sad space and the new, awesome space:

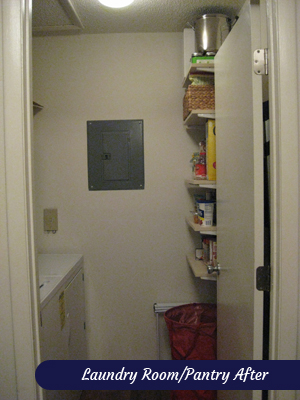
01_Laundry_Room_Before23_Laundry-Pantry-After

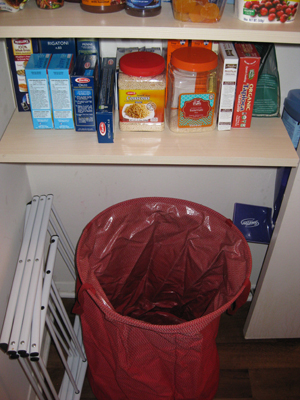
The blank wall where recyclables used to pile up is now an organized pantry. Speaking of recyclables, the red thing at the bottom of the photo is an Umbra Crunch Can that we picked up on sale at The Container Store while we were returning the unused wood screws that were included in our elfa order and a utility hook for another space that didn’t work out.

24_Recycling_Bin

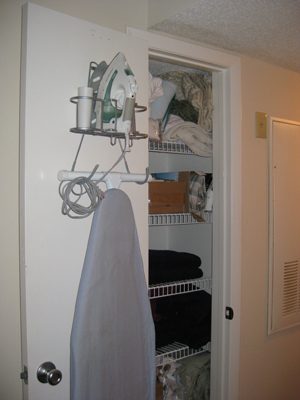
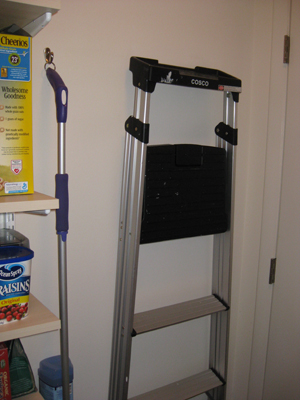
Next to the pantry shelves are hooks to hold our Swiffer WetJet and ultra-lightweight ladder. The Swiffer used to live on the back of the laundry room door along with our ironing board. I made the decision to hang them there right after we moved into the apartment, and it made sense to me at the time because I was frequently doing laundry in the dining room (which didn’t have any furniture in it for about 5 months). But we were getting tired of things banging around every time we opened the laundry room door, and we knew it would only get worse once the space started pulling double duty. So I relocated the ironing board to the back of the linen closet door in the hallway, which freed up space for the ladder. New homes for everything!

25_Pantry_Hooks26_Ironing_Board_in_Linen_Closet

We still have the cart in the living room, and it’s still hosting the caffeination station. We’ll probably move it into the dining room for now, but I think the ultimate goal is to sell/donate it and replace it with a bar cart that’s a little less visually bulky. Or maybe we’ll find another solution all together.

To celebrate the new pantry, I cooked dinner on Saturday. Justin usually handles the cooking these days since he isn’t working, so it was really nice to get into the kitchen and make something for a change. I foresee many more home-cooked meals to come.