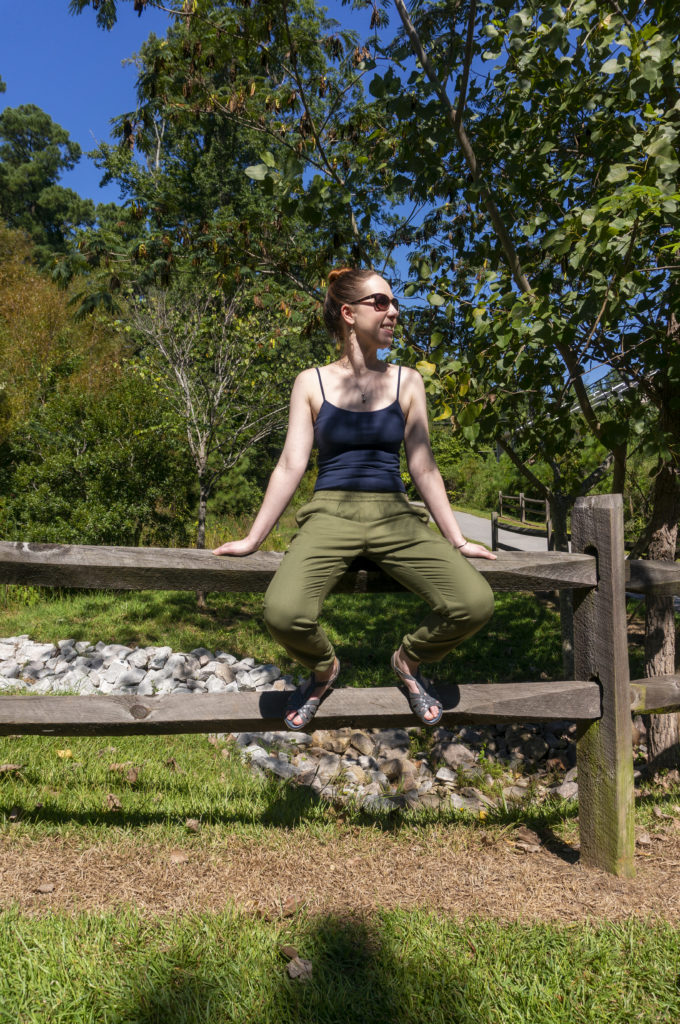
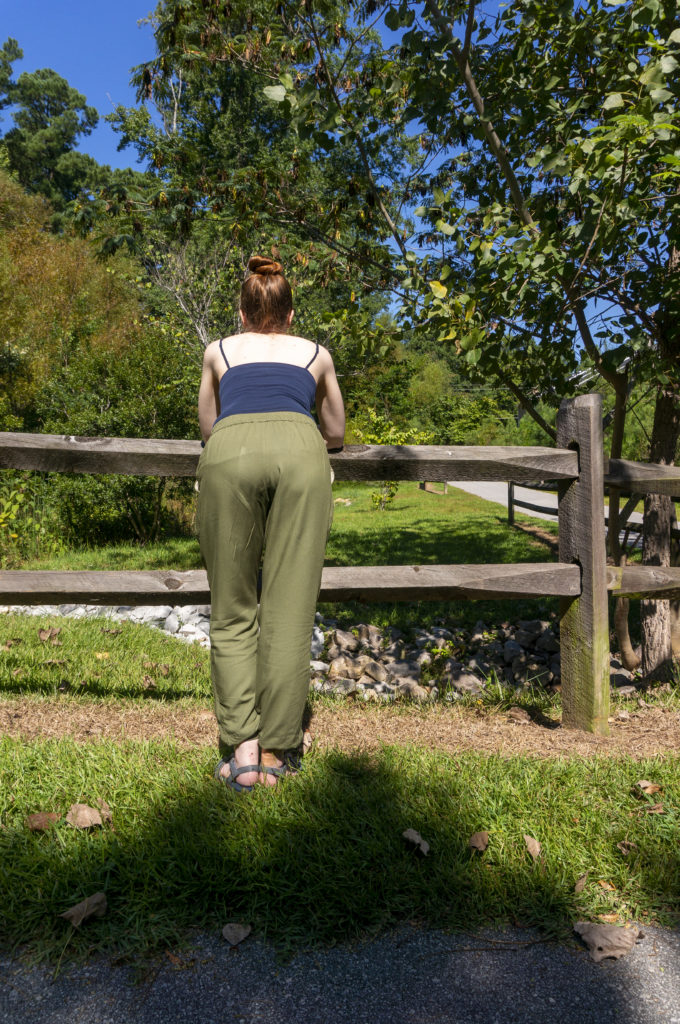
Everyday Joggers | Itch-to-Stitch Tierras

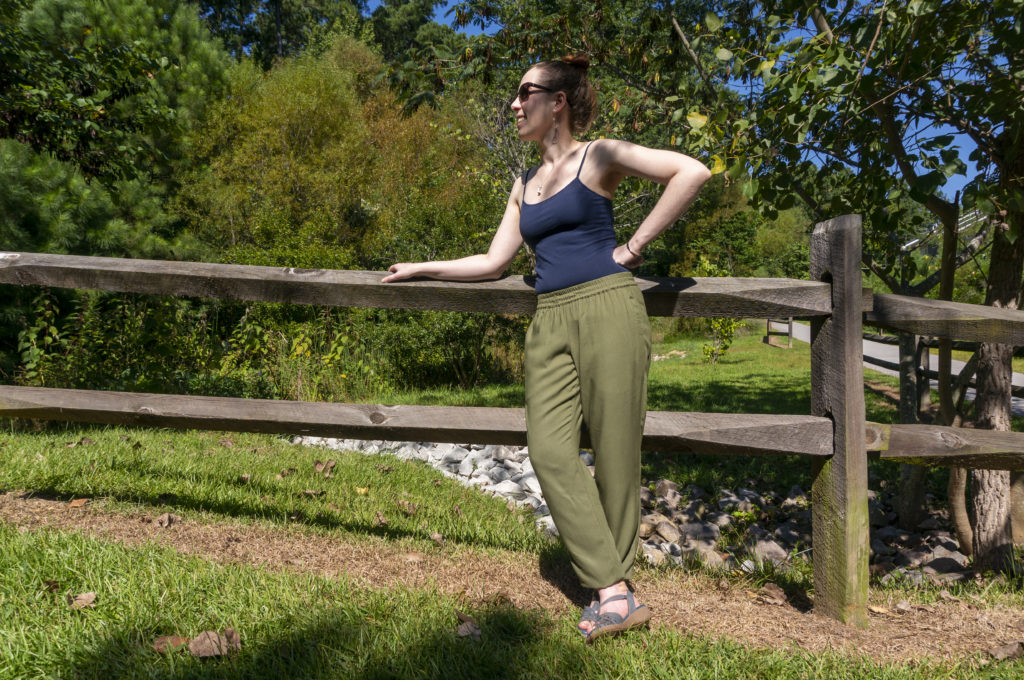
After finishing my Colette Zinnia skirt, I had enough of the sage green fabric leftover for one more project. A top would have been the obvious choice, but this sleeveless number is already pretty much perfect for me, I wasn’t feeling a boxy tee, and besides, I had a more pressing need: comfortable pants. Since I started working from home, I’ve been rotating between the same identical pairs of black leggings and my tartan pajama pants; the latter have been worn and washed so many times they developed a hole in the bum. While they waited to be repaired, I decided to see if I could eke out a pair of pants from my remaining mystery yardage.

Remembering that joggers had had a moment (more than five years ago, geez, am I slow to a trend or what?), I did a little searching around and landed on the Itch-to-Stitch Tierras, which had three things to recommend them:

  1. Designed for lightweight wovens
  2. Low-rise fit right out of the virtual envelope
  3. Deep, deep pockets

Bonus: Itch-to-Stitch is based in North Carolina, in nearby Sanford. Hi neighbor!
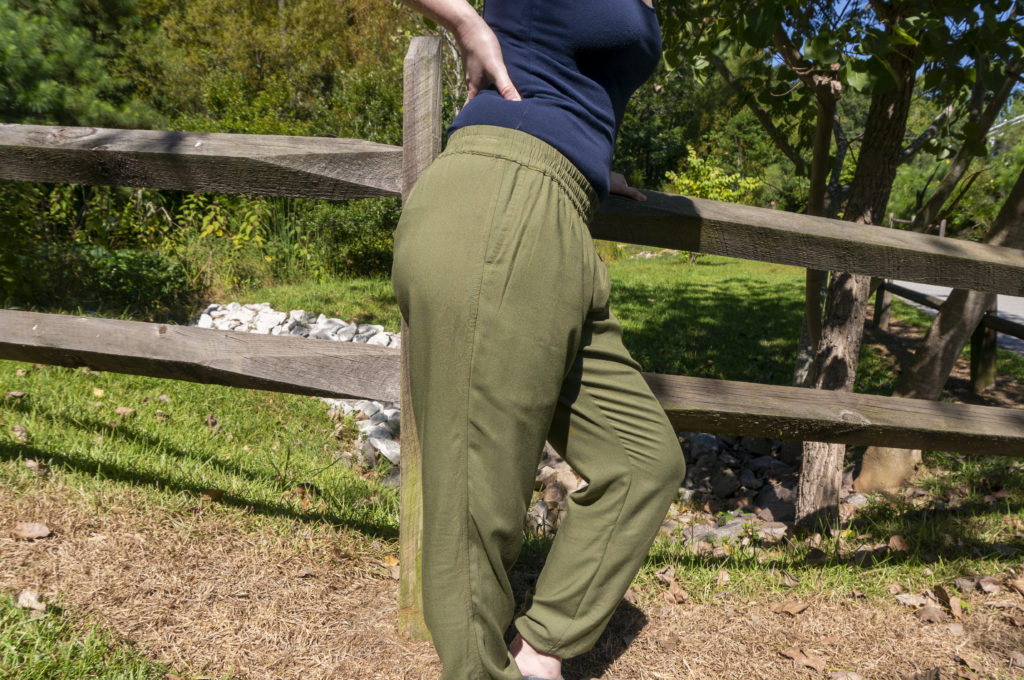
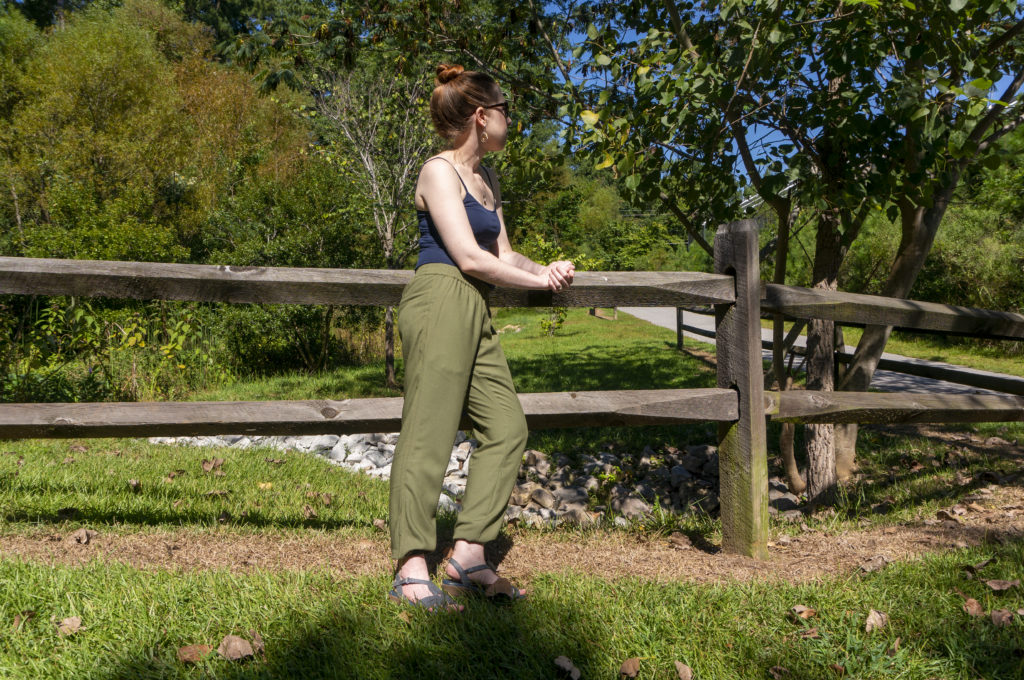
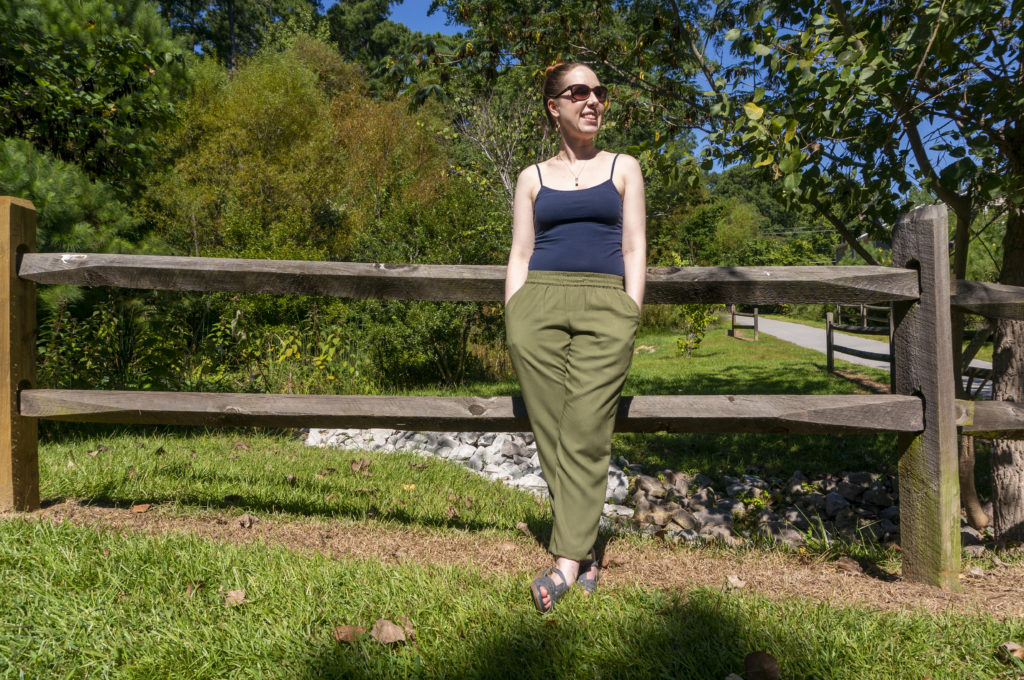
When I say the Itch-to-Stitch Tierras pockets are deep, I mean that wrinkle some six inches below the pocket opening is the bottom of the pocket bag.

The PDF pattern went together without any issues, and the provided instructions were quite thorough, including—hallelujah!—the finished garment measurements. Based on those measurements, I opted to shorten the inseam by a whopping 4″ and raise the front and back rise by 1″.

Now, I well and truly hopped on the low rise train in high school and I’ve never looked back, but after comparing the rise measurements to several pairs of stretch woven pants I already own, I was concerned they’d be too low even for my tastes. I’m only 5’2″, so if you’re average height or above, definitely check the rise before diving in.

Since my changes were significant, I made a muslin using an old cotton sateen bedsheet. It was the closest match I had to my fashion fabric in terms of weight and drape, but it wasn’t an objectively close match. I figured if the muslin came out okay I could wear them as pajamas, and if it didn’t, I could still cut the fabric down into pocket bags or handkerchiefs or something.

Let me tell you, the muslin very nearly did me in. Not because anything went wrong—again, the preparation and assembly instructions are clear—but because the fabric was different enough that the practice pants were crazy unflattering. They stuck out at the hips, stood away from my thighs but clung to my calves, and generally looked horrible to me. I wavered mightily, not wanting to waste the last bit of my nice fabric on wadder.

Justin observed that the altered length and rise, the two things I was actually checking on the muslin, were, in fact, good. He persuaded me to press onward, and he was right: the thinner, drapier fabric looks and feels loads better than the muslin did.

I briefly despaired about running out of fabric for both pieces of both pockets, then I remembered I had a bit of cream rayon bemberg leftover from this other sage green project that I could use for the pocket facings, which are invisible from the outside. The bemberg is a nice match in weight for my main fabric and a pleasure to slide your hands into. Hooray for saving scraps and shopping le stash for creative solutions!
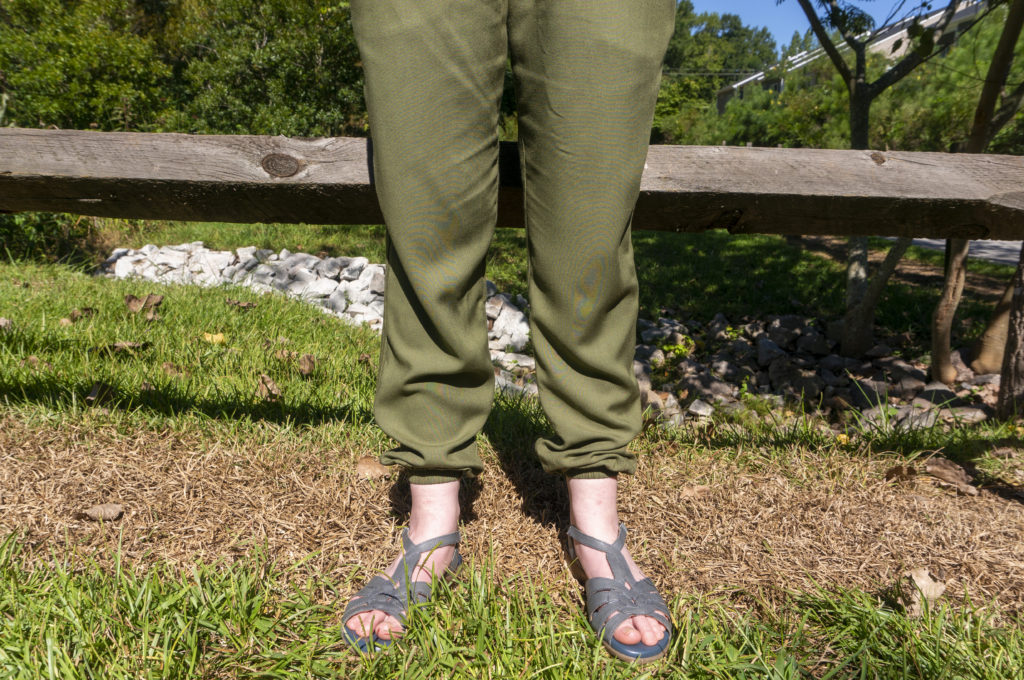
I used the prescribed 1.5″ elastic for the waist, but sized down to a 3/4″ elastic for the cuffs since it’s what I had on a hand and my slightly wobbly stitching meant that the recommended 1″ elastic would have been a tight fit. For both the waistband and the cuffs I attached the casings to the inside of the garment and then wrapped them to the outside and topstitched down. This is the opposite of what the instructions call for, but when topstitching I prefer not having to worry about whether I’m catching the casing on the inside, so this has turned into a normal adjustment for me.

I stitched buttonholes in the waistband for a drawstring per the pattern, but after wearing them several times I don’t think I’m going to bother with one; I don’t have another self fabric left for one, and I doubt I’d be able to find cord in the right color. My buttonhole placement is off, which means the topstitching on the waistband meander drunkenly to avoid sewing through them, but I love the overall look of the waistband too much to care. I dig the slightly sporty vibe it gives, I guess?

Honestly, the Itch-to-Stitch Tierras have been such a surprise to me all around. While I was specifically looking for a jogger silhouette, I more than half expected to feel meh about the outcome and never actually wear them. Instead I reach for them several times a week, often wearing them two days in a row. They’re also nice enough (in my opinion) that they don’t need to be relegated to the realm of house clothes. I personally love to throw them on to pick up takeout and pretend I’m an undercover celebrity.

These pants will continue to see weekly wear as the temperatures slowly cool off. Eventually I’ll want to switch them out for the season to something warmer, like French terry. An excuse to pick up the True Bias Hudsons, perhaps?


Outfit Details

Camisole: Aeropostale | Pants: Itch-to-Stitch Tierras | Sandals: Naturalizer | Sunglasses: Target | Earrings: Gift/unknown | Bracelet: Gift/unknown

Perfectly OK Tartan Pajama Pants

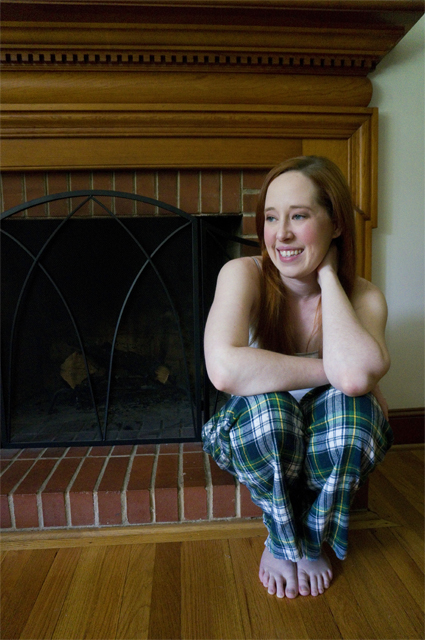
Caitlyn seated on a hearth, elbows resting on the knees of her tartan pajama pants, looking to the side and smiling

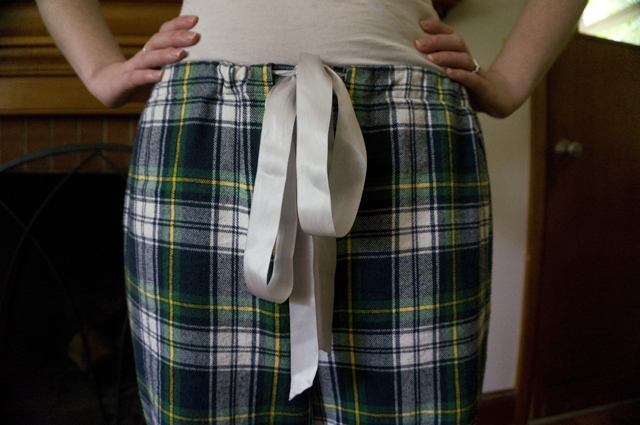
Close-up of tartan pajama pants waistband, which is held up with a silver satin ribbon tied in a bow

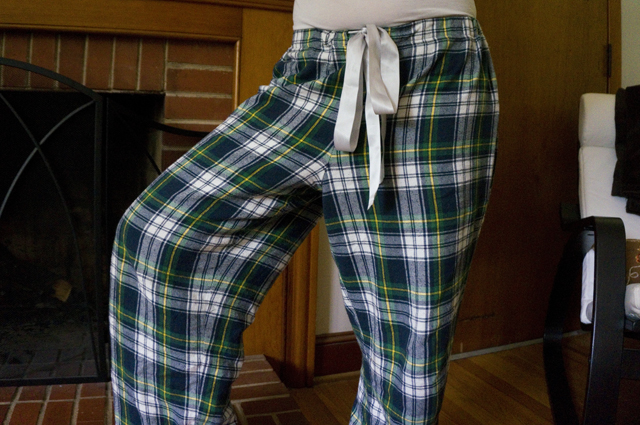
Legs akimbo, showing the fullness of the tartan pajama pants through the front of the hip and thigh

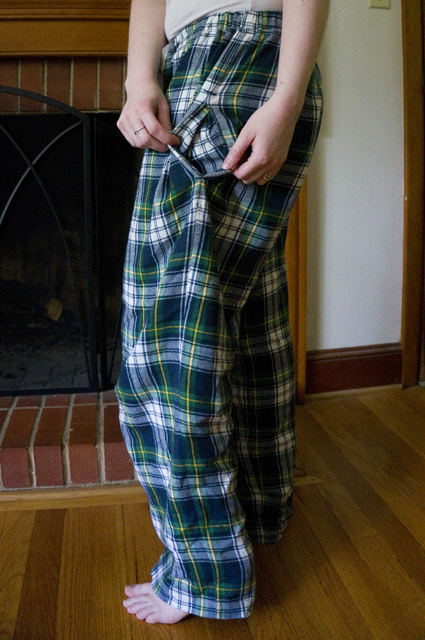
Side view of the tartan pajama pants with the pocket pulled open to reveal tartan pocket bags

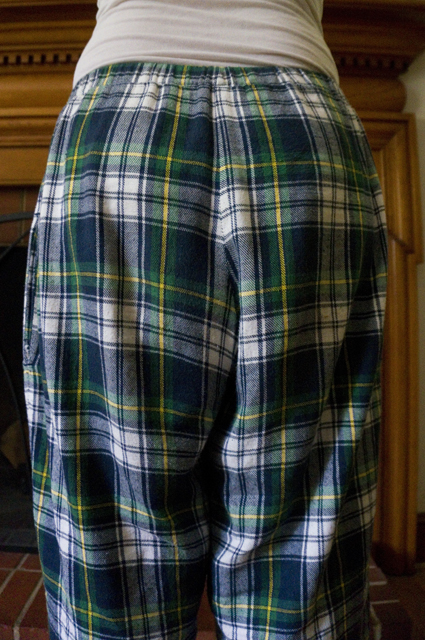
Rear view of the tartan pajama pants showing the stripe matching across the bum

While everyone else is reflecting on the end of the year, I’m scrambling to catch up on all of my 2018 projects! I had hoped to have that done before the holidays, but a combination of work deadlines and other professional obligations, as well as a few seasonal activities, meant I was busy right up until we went out of town for Christmas. I thought I might have time to write during my vacation (the longest I’ve taken since graduating college), but because we were visiting family we were far too wrapped up in eating, sleeping in, watching movies, playing games, and exchanging gifts to have much screen time. I’m not as bothered as I thought I’d be. So what if I have to put off doing any kind of wrap up until mid-January? No one was keeping score but me, and I’ve decided to misplace the scorecard.

The only trouble with being so far behind is trying to remember what I did (or didn’t do). I actually have a lovely sewing planner that my sister gave me—the pages came from this Etsy shop, and she comb-bound it with acetate covers herself to make it more durable—but I have a devilishly hard time remembering to actually write in it. These tartan pajama pants are a great example of a project that would have benefited hugely from taking notes, because they a) were intended as a wearable muslin, b) involved several modifications to a basic pattern, and c) required a significant hack job to fit correctly because of additional alterations I forgot to make.

The pattern is, I believe, Simplicity 1520. I say “believe” because I also have Simplicity 0301, a unisex pattern that was formerly available for free on Simplicity’s site but has since been removed or very well hidden. The reason I passed over the free pattern in favor of a purchased one is because the free pattern has a simple cased elastic and a very generous fit, whereas I was looking for a slimmer cut, a combination of elastic and drawstring, and preferably pockets. The joke’s on me, however, because although S1520 appears to fit that bill, it actually has none of those features—I misread the back of the envelope and ended up with effectively the same pattern.

As best as I can remember, I modified the pattern to include buttonholes at the waist to feed a drawstring through, shortened the inseam at the lengthen/shorten line to accommodate my 5’2″ frame, and marked the placement for inseam pockets using my pocket template (AKA the pockets from Simplicity 1419).

What I notably failed to do was reduce the crotch depth, both because I’m shorter than average and because I prefer to wear my pants (especially my lounge pants) on my hips. I was blissfully ignorant of this oversight until I’d already made the buttonholes (and folded and sewn down the top of the pants to make a casing for the elastic), and I was so annoyed about it that I decided to salvage what I had instead of completely reworking it. That is to say, instead of cutting off the top of the pants at the correct height, making new buttonholes, and folding down a new casing, I lopped off the “waistband” 5/8 inches below the stitching line that made the casing, removed something like 3″ of excess fabric from the crotch, and reattached the “waistband” by stitching in the ditch. My ditch-stitching wasn’t very tidy, but you can’t really tell. The bigger giveaway is that the tartan no longer lines up near near the top of the pants, but honestly far less egregious than the (lack of) stripe matching you normally see in ready-to-wear.

Shortening the crotch meant moving the pockets down as well, but that was a straightforward change, albeit a time-consuming one because I’d already serged the seams. (Ugh, why.) I moved them a little too far down, so they’re not really useful for sticking my hands in. They still work just fine for a phone, so I could not be bothered to move them a second time.

The fabric is a lightweight flannel shirting from JoAnn. To match the tartan, I cut everything on a single layer and used a walking foot to sew my seams before finishing them with a serger. I focused on making sure the horizontal stripes matched across vertical seams, and I feel I was successful; next time, I’ll pay more attention to respecting the pattern repeat and mirroring the vertical stripes as well.

The silver ribbon was a freebie that came tied to the bag of an Aerie purchase. Instead of threading both elastic and ribbon through the casing, I took a cue from Lauren’s Margot PJ Pants and cut my ribbon in half before sewing each piece to the end of a length of no-roll elastic. I thought for sure I was going to love this, but in reality I don’t. It’s a pain to try to cinch the pants and keep the slippery polyester satin bow tied. I can’t decide if I’d rather just elastic or just a drawstring, but this hybrid jobby just ain’t doin’ it for me.

Given how badly I botched the fit initially, I don’t think these are a very good muslin, but they for sure are wearable. I’ve basically been living in them this winter, especially since I switch into lounge pants as soon as I get home from work. I have more of this flannel stashed away—my first cut shrank in the wash and was just too short for pants—that I’m hoping to use for a second cozy project. And since I could use another pair of winter pajama pants, I’ll probably take a second crack at this pattern before finally cutting into a more precious fabric that I’ve been hoarding. (Yes, precious pajama fabric. You’ll understand when you see it.)

Here’s hoping that, in 2019, I can graduate to a level of sewing where I don’t mess up pajama pants. 😂

FO: Pumped Up in Pink

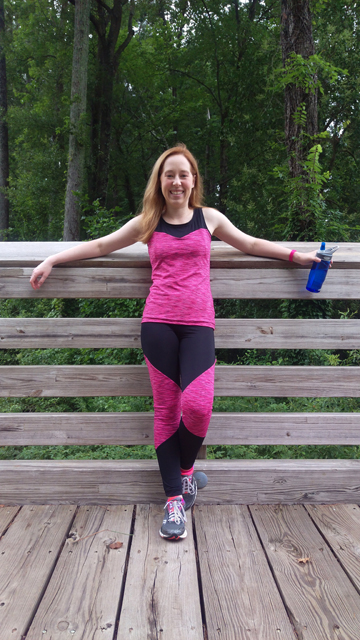
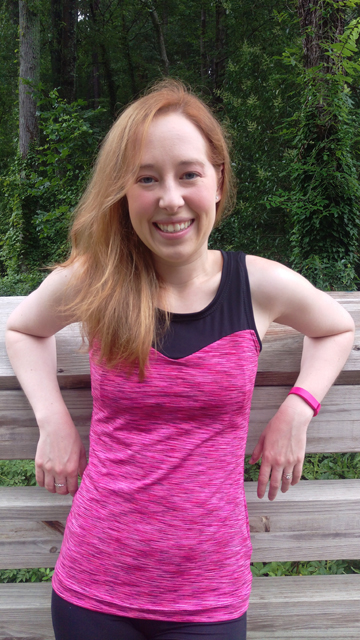
At some point around the end of June or the beginning of July—that hazy time before the flood—I completed a second set of gym clothes using the same patterns as my first set (Top: New Look 6285 View C; Leggings: McCall’s 7261 View D). I had expected the first attempt to be something of a wearable muslin, and when it indeed turned out to be quite wearable, I had high hopes that with the second attempt I would skillfully incorporate all of those lessons learned, resulting in a nigh-on-perfect fit. Instead, I managed to create new issues while fixing the original ones, so that take two is more of a different fit than a better one.

2016-09-05_01_full-length

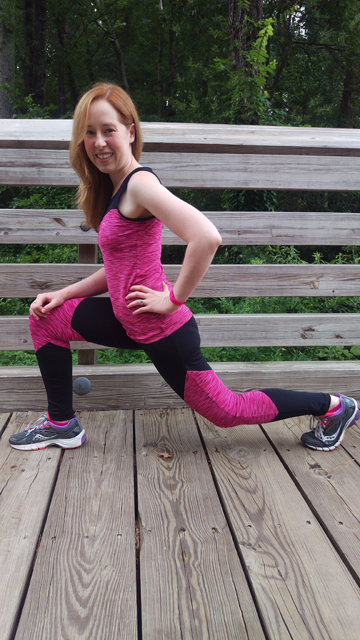
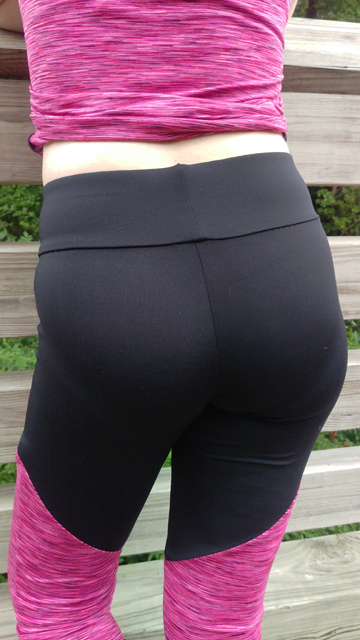
The first thing I set out to fix was the tightness of the pants. While I like my leggings to fit closely, there was some straining at the seams, especially when I was doing leg presses. No popped stitches yet, but better safe than sorry, right? So instead of using the pattern pieces I had traced off previously, where I had shaved off ¼” all the way around so that I could serge with a 3/8” seam allowance on the original stitching line, I traced off a fresh set of pattern pieces along the original size lines but serged with the same 3/8” seam allowance, effectively increasing the leg, hip, and waist circumferences by 1”. (Lengths were also increased, which I figured would be beneficial, and could be shaved down easily enough if needed.)  One inch ended up being a lot more than I needed, so I pinched out the excess and resewed the outseams, removing—can you believe this?—1/2” each from the front and back leg pieces, or a total of 1” for each leg. Somehow, this still resulted in an ever-so-slightly roomier fit, and now I can safely do lunges without fear of splitting a seam open.

2016-09-05_02_lunge

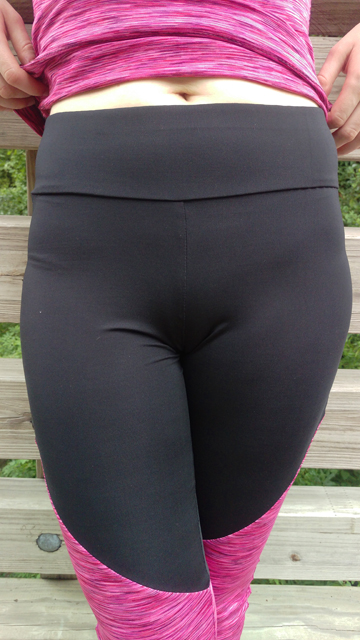
The other major change I made to the pants was the waistband. My first pair had a wide band but no elastic, so the band tends to fold or roll down on itself when I bend or sit. To prevent this, instead of cutting one folded waistband, I cut two waistband pieces, each with an extra 3/8” seam allowance on the top edge, and sandwiched the elastic in the top seam.

2016-09-05_03_front-waistband

In order to get the smoothest possible interior and exterior, my steps (to the best of my recall) looked something like this:

  1. Place waistband pieces right sides together.
  2. Lay ¾” elastic on top of the waistband pieces, aligning them along one long edge.
  3. With the elastic still on top, serge all three layers together. The waistband piece in direct contact with the elastic—the middle layer of the sandwich—will be the inner waistband; the other waistband piece will be the outer waistband.
  4. Turn the sandwich over so that the elastic is now on the bottom.
  5. Open the waistband pieces so that the right sides are visible.
  6. Understitch the inner waistband—the piece lying directly on top of the elastic, the middle layer of the sandwich—by using a narrow zigzag to sew the fabric to the elastic opposite the serged edge.
  7. With the inner and outer waistband pieces still opened up, fold the entire waistband in half to align the short edges—the center back seam—and serge.
  8. Wrap the outer waistband piece over the top of the serged edge of the elastic, placing the elastic in the middle of the sandwich and aligning the bottom edges of the inner and outer waistband pieces. (If you cut the waistband pieces the same size, they won’t actually align; you can either try to calculate how much longer one piece needs to be than the other and cut your original pieces accordingly, or do like I did and just trim the longer piece to match the shorter one during this step.)
  9. If the center back seam feels too pronounced, you can open the inner and outer waistband pieces back up, snip into the serged edge just above the elastic, and then fold the seam allowances in opposite directions before turning the waistband wrong sides together again.
  10. Attached the waistband to the top of the pants as you normally would.

The result is smooth waistband with a lot of more staying power.

Unfortunately, I’d completely clean-finished the waistband before attaching it and realizing that the pants were too big around. Since I didn’t want to completely disassemble the waistband to take out the extra width, I only went back as far as Step #7, cut off ½” from each short end, and re-serged. It saved time but meant that the bulk-reduction trick in Step #9 wasn’t feasible, and I can definitely feel the CB seam when I’m sitting with my back against a chair/weight machine. I had also clearly lost my motivation to line up my seams by the time I was attaching the waistband for the second time.

2016-09-05_04_back-waistband

On the bright side, other seams match up a little better this time around.

2016-09-05_05_leg-seam-detail

Seriously, is there a trick to this? Even with pins and a walking foot, matching seam lines is like spinning a roulette wheel for me.

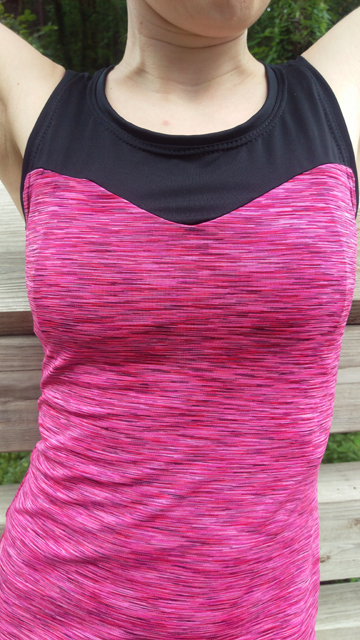
Anyway, on to the top! I’m ashamed to admit how long it took me to change the essentially straight seam to the sweetheart one you see below, and it’s entirely down to the fact that when I tried to join the original yoke and body pattern pieces into a single piece that I could modify, I completely missed that some parts of the pattern are marked with a 3/8” seam allowance and others are marked with a 5/8” seam allowance. There doesn’t appear to be any rhyme or reason to this, and I definitely sewed the first top with 3/8” seams throughout. Once I got that sorted, it was easy enough to draw in my desired seam shape, cut apart, and add new seam allowances.

2016-09-05_06_yoke-detail

I didn’t quite get a point at the bottom of the heart, but using a ton of pins, basting, and then serging slowly made for a pretty smooth curve that I’m rather proud of. Then I forgot to topstitch the yoke seam. Again.

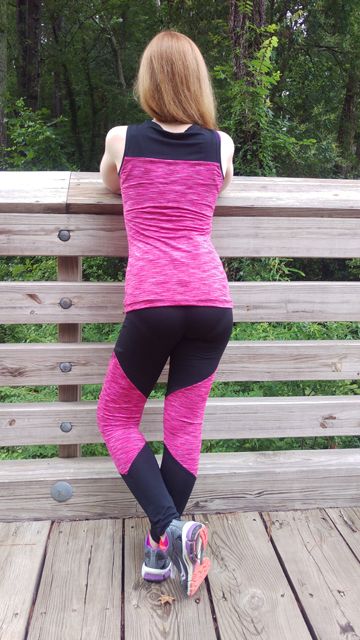
I chose to take the entire top up at the shoulders by an inch based on the fit of the earlier incarnation, but I wish I hadn’t: the armholes were a bit low before, but they’re definitely too high now. Also, I’m pretty sure I’ve caused back neck gaping that wasn’t there before. Live and learn, I suppose. If ever there was someone prone to overfitting, it would be me.

2016-09-05_07_back-view

All in all, it’s not the perfect fit I was hoping for, but I’ve increased my workout wardrobe by another 50%. Can’t complain about that!


2016-09-05_08_happy-face

FO: Active in Aqua

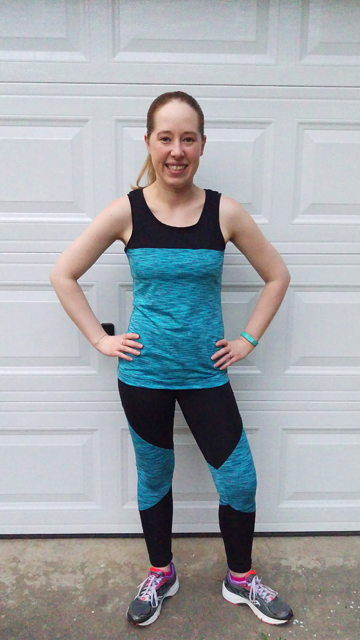
For Christmas 2014, Justin encouraged my renewed interest in fitness by gifting me a complete gym kickstarter kit that included a Fitbit, a Camelbak water bottle, and a pair of athletic leggings with matching wicking T-shirt. The clothes, which replaced the ratty cotton-spandex yoga pants and novelty tees I’d worn to the gym all throughout college, were a huge upgrade in terms of comfort and performance. They’re easily in my top 5 most used gifts, and they’ve held up really well over the last year and a half—in fact, they’re still going strong—but they have two drawbacks. First, the leggings are from Under Armour’s ColdGear line, which means they’re lined with microfleece for warmth and thus not the most suitable for spring/summer wear (even though that wear takes place in an air conditioned gym). Second, they’re just one set, which means I have to wash them at least once a week if I don’t want to offend fellow gym-goers with my rank aroma.

I’d been eyeing a few different options from major athletic brands online and crossing my fingers for a sale, until, on a quick trip to JoAnn to pick up some notion or other, I casually spied some pretty space-dyed polyester-spandex described as a quick-drying performance fabric (still available here at the time of writing; don’t trust the color in the shop photo).

2016-06-01_01_Full-Length-Front-View

I tried to talk myself out of it, but in the process only managed to stumble upon the same fabric in another colorway (also still available here; again, don’t trust the color in the shop photo) as well as a complementary solid black (I believe this is the one). Deciding this was a prime opportunity to vote with my dollars and show JoAnn there’s a market for apparel fabric and specifically athletic fabrics, and also determining that this was probably the one time where it actually would be cheaper to make my own clothes rather than buy them, I brought home a couple of yards of each.

2016-06-01_02_Full-Length-Back-View

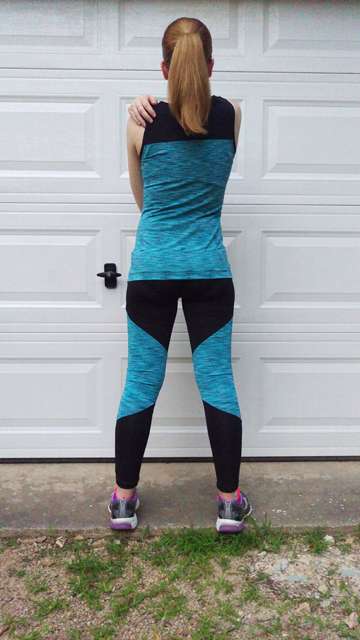
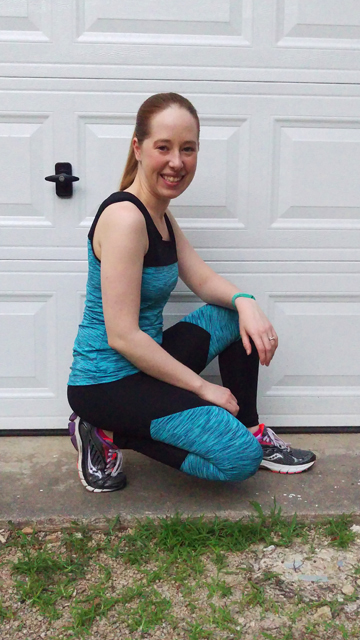
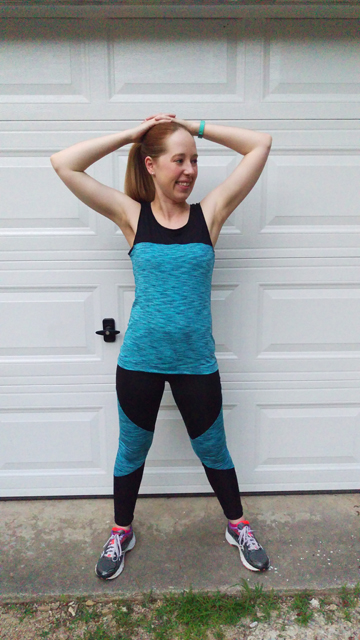
Lightweight leggings and a fitted tank are perfect for the warmer days of spring. The tank top is New Look 6285 View C and the leggings are McCall’s 7261 View D.

2016-06-01_04_Crouched-Side-View

Let’s talk about the tank top first, since it was a much more straightforward project.

N6285 isn’t marketed as an athletic pattern, but the basic design works for both my casual wear and exercise needs, and the color-blocking possibilities immediately caught my attention. Coordinating gym separates are something I’ve longed for since my (broke) college days—who doesn’t feel more motivated by a matching gym set? It may not be readily apparent from the envelope art, but View C has an hourglass silhouette while Views A and B are straighter and looser. Since my current gym t-shirt is on the relaxed side, I thought it would be fun to try a more fitted top to see which I prefer.

2016-06-01_03_Full-Length-Front-View

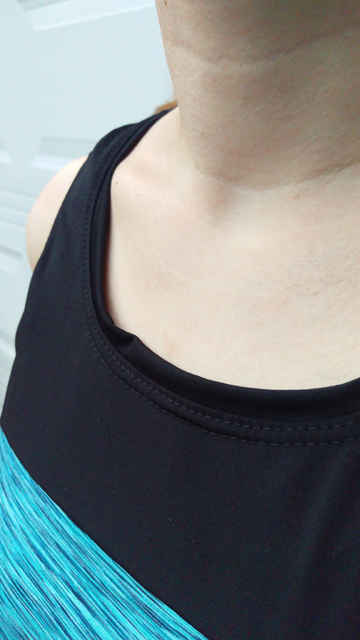
I cut a straight size 6 based on the finished measurements; a size 8 would probably work just as well, but cling a little less around the stomach. The pattern is drafted with 3/8″ seam allowances, which is perfect for serging. I jumped straight to assembling everything on my serger rather than basting/sewing with a zigzag on my sewing machine first, which resulted in three places where I failed to catch all of the layers. But a little hand-stitching followed by more careful topstitching made those places practically invisible on the finished garment. In fact, I’m pretty pleased with how steady my topstitching came out, even if the neckband is a little wavy.

2016-06-01_06_Neck-Detail

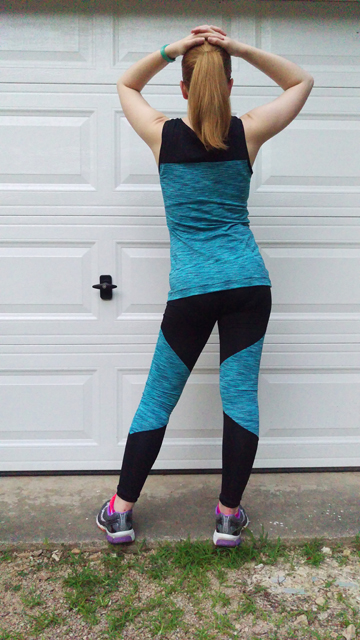
The top is a little longer than I expected, but the length combined with the negative ease keeps everything anchored nicely around my hips, even when I’m running, so I don’t think I’d shorten it on future versions. The straps also seem a wee bit long: the armscyes don’t quite expose my sports bra, but it’s close, and even though that doesn’t really bother me, I think I’d like to take them up a bit just so the yoke, the widest part of the bust, and the armscyes are sitting where they’re supposed to. I wish I had thought to topstitch the yoke seam, but I’d already sewn everything together by the time the idea occurred to me, so I’ve filed it away for next time.

2016-06-01_05_Full-Length-Back-View

Now, let’s talk about those leggings. I’d made two pairs of cotton-spandex leggings using McCall’s 6173 View B (unblogged, because they’re vanilla black leggings), so I initially assumed that these athletic leggings would be built from the same block, and that I could simply transfer the minor fit changes I’d made previously to this new, slightly more interesting variation. A quick look at the tissue proved that this was not the case. In fact, I have this sneaking suspicion that the M7261 leggings aren’t designed from a knit block at all, but instead use a woven trouser block. Based on the observations below, see if you agree with me:

  • M6173 is sized XS–XL, whereas M7261 is sized 6–22
  • M7261 has a completely different front and back crotch curve than M6173
  • M6173 is graded such that the sizes are nested with no overlap, whereas M7261 is graded with overlapping size lines
  • Most if not all of the reviews on Pattern Review complain that M7261 run large instead of being fitted like one would expect for a pair of leggings

Pretty fishy, right? Luckily, I had the two patterns to compare as well as the reviews to help me choose my base size and modifications. Unfortunately, McCall’s was not about to let me off that easily, as they did not see fit to include the finished waist, hip, or inseam measurement, nor did they mark the location of the hipline. I found myself muttering “Seriously?!” over and over as I tried to line up the pieces to determine the correct size. I cannot for the life of me figure out why none of this information is printed on the envelope, in the instructions, or on the tissue, since ALL of this information was essential to creating the pattern. Surely it’s in a spreadsheet somewhere?

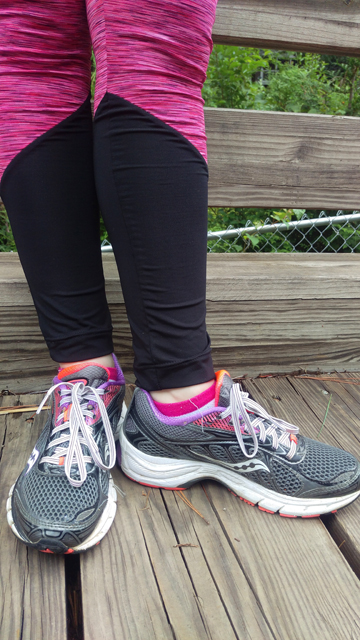
I ultimately chose to make the size 6. Because I’m only 5’2″, I shortened the legs by a total of 4″; to keep the balance of the contrasting sections, I subtracted 2″ at the lengthen/shorten line and another 2″ from a line I drew on the bottom leg piece (specifically, a line drawn at the same distance from the leg seam as the provided length/shorten line is located). Since I’m not a fan of pants that sit at my natural waistline, I lowered the front rise by 1.5″ and the back rise by 1.25″ based on the fit of my RTW running leggings, which sit slightly higher than my regular pants and hit between my natural waist and the top of my hip bones.

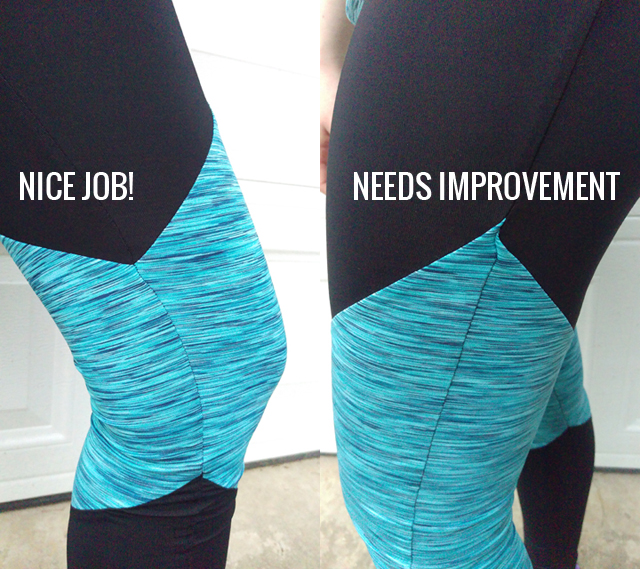
Then, I painstakingly reduced the seam allowances of every piece from 5/8″ to 3/8″. Ostensibly this was for ease of serging and because I hate waste, but in reality I might just be some kind of masochist. I’m not sure if I redrew some of the notches in the wrong places, or if I made the mistake of matching edges when I should have been matching notches, but my seam intersections are hit-or-miss.

2016-06-01_07_Seam-Details

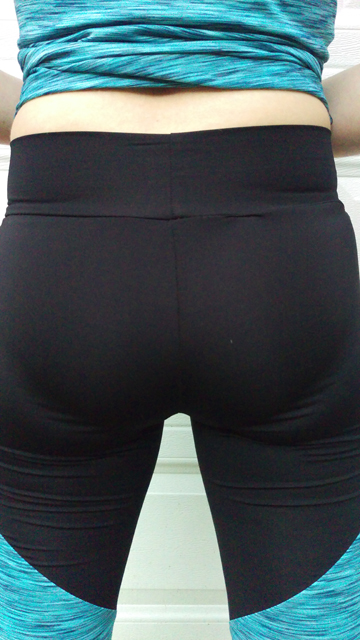
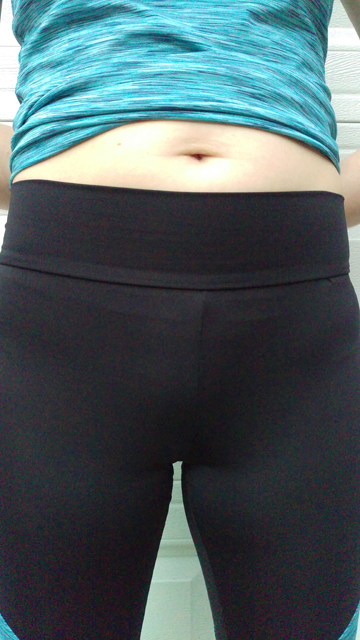
The verdict on all those fit changes? Good, but not great. As soon as I pulled on the finished leggings I could detect a bit of camel toe happening in the front and a valley forming along the center back seam. It’s not terribly noticeable to others, but I can definitely feel it. The obvious solution will be to copy the crotch curve from my other pairs of McCall’s leggings, which don’t have these issues. The fit is also a little too snug throughout, especially around the bum when I squat/do leg presses, but I think this can be easily solved by tracing off the size 6 with its 5/8″  seam allowances, but sewing them at 3/8″ instead.

2016-06-01_09_Waist-Detail-Back-View

A few people on Pattern Review noted that the waistband doesn’t stay put. I didn’t think it would be a problem at first, but when I move around, it definitely has a tendency to roll. I thought maybe it was just a result of using a very light material under too much tension, but after re-inspecting my RTW running leggings, I realized that they do, in fact, have an elastic sewn into the seam at the top of a wide waistband. I’m definitely going to incorporate this feature into my next pair.

2016-06-01_08_Waist-Detail-Front-View

The real test, of course, comes from wearing the ensemble for exercise. I’m happy to report that this outfit’s maiden voyage to the gym did not result in any split seams, unexpectedly see-through fabrics, or other forms of abject embarrassment. In fact, although I said the fit was good but not great, a lot of the nit-picky fit issues weren’t that noticeable once I fell into the rhythm of jogging on the treadmill. That’s not to say the issues aren’t worth fixing, but it just goes to show that just because a garment doesn’t bear up under minute scrutiny doesn’t make it unwearable or even all that uncomfortable. And that gets me pretty pumped to sew up another set so that I have more options on gym days.