


When Lauren announced back in April she was partnering with Sprout Patterns to do a sew-along—really, a workshop—for the Archer button-up, and that it would be held just 30 minutes from where I live, I knew I had to jump on it. The event ticked a bunch of boxes at once:
- I’d been meaning to visit the Spoonflower headquarters in Durham since I moved to North Carolina five years ago
- I’ve wanted to try a Grainline pattern for ages but couldn’t quite justify the purchase when I have a stash of patterns and fabrics waiting to be used already
- I’ve thought about taking a sewing class as a way to be more social while improving my skills, but most classes are aimed at absolute beginners and tackle projects I’m not interested in
- Lladybird was one of the first sewing blogs I started reading regularly, and I couldn’t resist the opportunity to meet a sewing celebrity
Because this was the first time Sprout Patterns had done a collaboration like this, the process was a little hazy at times. For instance, there was a very limited number of spots in the class, so registration was first-come, first-served. All well and good, but when I submitted my registration through their online form, I received an email with the subject line “2018 Sprout Sew-Along with Lauren Taylor” and the sender “Confirmation Message” but a blank email body. Hmm. Did this mean that I had secured a spot, or merely that my request had been received and I was on the waiting list? Nail-biting ensues. Five days later, I received another email that confirmed I had indeed scored a coveted seat in the class. Whew, that was a relief! I assume they had to handle some portion of the registration manually and that was the cause of the wait, but a simple message up front could prevented a bit of unnecessary anxiety for those like me who did get in, and tempered the expectations of those who ultimately wouldn’t.
The confirmation email included a simple schedule (meet-and-greet on Friday night, sewing all day Saturday and Sunday), a pre-class checklist in the form of a Google Doc, and a link to video explaining how to order your pattern and fabric through the Sprout Patterns site. I confess I only skimmed the video, as the process of purchasing the materials was pretty straight forward: follow the steps to order a Sprout Pattern as you normally would and use a class-specific coupon code to get the pattern of your choice printed on Kona® Cotton Ultra with free shipping.
If you’ve spent any time on the Spoonflower site at all, you don’t need me to explain the hours I spent browsing for the perfect print for my Archer—there’s an overwhelming number of pretty, quirky, colorful, fun, bold, and bizarre designs already available even before delving into creating your own.
But I’d also suggest the severely constrained browse/search functionality on the site makes choosing a design more arduous than it needs to be. You can browse By Designs or By Color, which uses a system of categories and sub-categories, but if you select one of these you can’t narrow your criteria any further. You can do a search instead, but it’s really unclear whether this search is looking at the name of the category or categories the design is in, the name of the design itself, a set of invisible keywords, or some combination of the three. Using or not using quotation marks around your search terms does change your search results, but not in a predictable way. It’s frustrating to say the least, especially since there are plenty of models for different, successful systems.
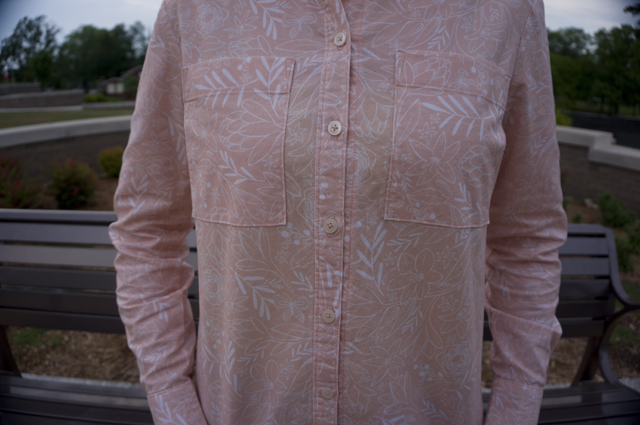
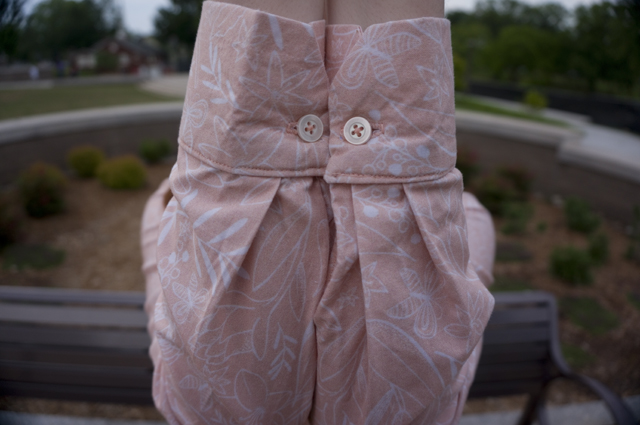
After narrowing my favorites to around 30 designs, most of which were line art florals or dots/spots, and most of which were on a coral or blush background, I settled on Botanical Sketchbook – Floral Pink Blush by Heather Dutton. Then I popped over the Sprout Patterns site and selected the Archer pattern, View A, Size 2, and picked the design from my Spoonflower favorites. (You don’t need to browse Spoonflower first and then go to Sprout—you can browse designs directly on the Sprout site—but I found it easier to browse in the full-window view of the former as opposed to the smaller pop-up window browsing available with the latter.)
Sprout generates 2D and 3D models to help you visualize the scale of the design and determine its placement. The models are very helpful for avoiding unfortunate print placement, but the one shortcoming I see is that the pattern pieces aren’t labeled in the 2D model, so it’s possible to start dragging the print around without immediately seeing which piece you’re affecting, particularly in the case of small pieces or ones that are mostly hidden on a finished garment, such as a collar stand. In my case, I confused the pieces for the pockets and the cuffs, and it took an embarrassingly long time to figure out why I couldn’t move the large round flowers plastered over the nipples. Eventually I was satisfied with my choices, and I put the order in my cart and checked out with the coupon code with no issues.
It’s at this point I should probably mention that I felt a great deal of anxiety about placing my order, for a reason that I hadn’t expected. See, I’d received confirmation that I was registered for the class on February 28 along with instructions for ordering, and the class itself was scheduled for April 6–8. But I never actually received any guidance on how quickly I needed to place my order to allow enough time for it to be printed and shipped. The Sprout FAQ mentions that “average turnaround time for all products is 2-3 weeks,” but none of the correspondence mentioned this, or even directed students to the FAQ. I think the organizers must have assumed that everyone would want to get their patterns and fabric in hand as soon as possible, and it was never my intention to dally, but by the time I saw that key piece of information, there was a lot less than three weeks left, and I was in a bit of a panic. Again, a quick email would have done wonders here—a little “hey, if you haven’t ordered yet, you’ll want to do that soon!” would have been enough to make me commit to a decision.
Luckily, my order shipped in just two days, and since I’m in the next town over, it only took a few more days by mail to land on my doorstep. I had plenty of time to pre-wash my fabric and swing into JoAnn to pick up interfacing, coordinating thread, and basic translucent shirt buttons. In terms of tools, we were expected to bring our own sewing machines, pins, needles, snips, and so on, but scissors, cutting mats, irons and ironing boards, and sergers (for finishing seams) were provided.
On Friday night, the class gathered for a meet-and-greet with Lauren, who is exactly the person in real life that you’d expect her to be from her blog (which is something she stressed is important to her when she did her interview on the Love to Sew podcast). We snacked and drank and cut out our patterns while she chatted with us about sewing, blogging, and even gave a peek into her personal life.
Saturday and Sunday were both sewing days. Rather than do a sample project, showing us each step and then having us to it ourselves at the same time, Lauren chose to give us a short set of instructions to tackle a particular section of the shirt, and then when the first person hit a roadblock, she’d mime the steps to complete the task on that student’s pieces, folding or pointing or marking (but not sewing) as needed. If any student got behind, or needed to see the steps again, she’d walk them through it individually on their own shirt. She said she was happy to repeat herself as many times as needed, because she’d rather have students work at their own pace then be handcuffed to the rest of the class, with the speedier students feeling bored and the slower students feeling anxious. I’d say it worked pretty well: it allowed us plenty of time to socialize, observe each other’s progress, and take breaks as needed to avoid becoming tired or frustrated. (The snacks and grown-up beverages available throughout the day didn’t hurt either.)
Because our sewing time was divided up over two days and limited to about six hours each day, we ignored Grainline’s order of operations and also used a couple of alternative methods. For instance, we attached the plackets, collar stand, and cuffs to outside of the shirt and then topstitched from the inside to avoid needing to re-sew if the topstitching veered off course and failed to catch the fabric on the inside. We also used the burrito method to get a clean finish on the yoke, which I quite like.
Lauren also recommended several great tools and resources, including an expandable sewing gauge to mark buttonhole placement (always put a button in line with the apex of your bust to avoid gaping!), a buttonhole chisel, and weft interfacing from Fashion Sewing Supply. (At least, I think she recommended the weft, although the site itself advises that it’s not suitable for shirtmaking. Hmm.)
Lauren is exactly the kind of teacher I want for a sewing class: smart but not rigid, personable but able to keep things moving. I’m glad I got to take my first class with her, and hope to have the opportunity to take another class in the future (jeansmaking, maybe?)
The Spoonflower crew were also incredibly gracious hosts who were quick to offer supplies or assistance to anyone who needed them. They even made time for a tour of the facility at the end of the weekend. It’s a shame that the sew-along was the last class they had planned for the foreseeable future—the run-up to the event may have been shaky, but when it comes to day-of execution, they’re great facilitators.
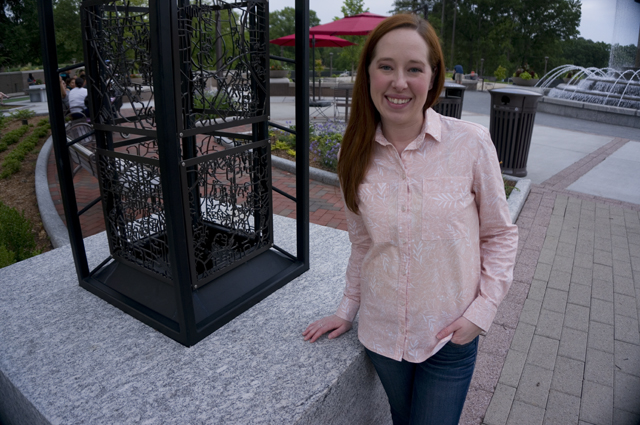
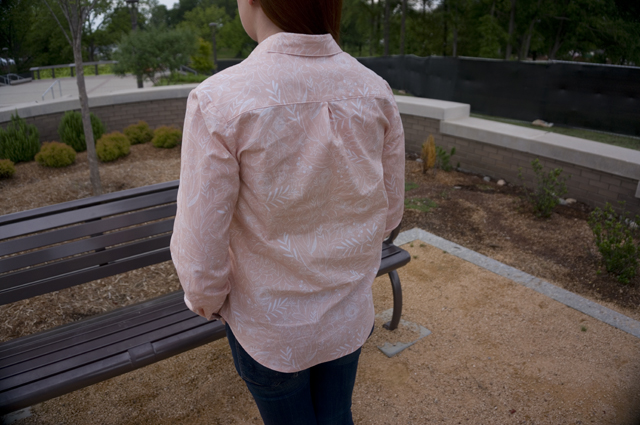
As for the Archer itself, I’m quite pleased with how it came out. I’m lucky that the Size 2 fits pretty well out of the packet; the only thing I’d definitely change is bringing in the shoulders. I love the curved hem because I don’t like to tuck in my shirts. The Kona® Cotton Ultra was easy to press and sew, but it’s thicker and stiffer than I’d prefer for a button-up shirt, and I think it may be the culprit of some of the rumpling in the back. If/when I make it again, I’ll look for something lighter like a poplin or a lightweight cotton sateen. (Probably. I’m also tempted by all the flannel for fall.)
I’ll be glad to have this shirt in my wardrobe when the weather (finally) decides to cool down, but more importantly, I’m excited to have some transferable skills in my sewing toolkit. I fantasize about being the kind of slow sewist who savors the precise construction of an impeccably fitted shirt, but I’d happily settle for becoming a halfway patient sewist who can get her pockets to match and her topstitching to stay on the fabric!

