Saint Vicious | Made-to-Measure Knee Socks

I’m generally a selfish maker, I make no bones about that. While I’ve made a handful of things for others, I typically stick to things I’ve already made for myself and feel comfortable with. The exception to this practice is socks: the first properly wearable pair I made were a gift for my sister-in-law. Before that, I’d attempted a pair of ankle socks for myself (abandoned after the first sock for being too big in every dimension) and then a pair of crew socks (recycled because the yarn was unpleasant to wear). Multiple failed attempts combined with a general dislike for small circumference knitting had me pretty well convinced that handmade socks were not in my future.

Except that I rather like wool socks! I have several pairs in different styles from SmartWool, and my friends rave about Bombas. I figured I needed to give it one last solid try before giving up completely. I was also in need of a portable project during a meetup, and socks are nothing if not quintessential handbag knitting.

I hastily cast on before leaving the house, which proved unnecessary as I ended up doing no knitting whatsoever that night. Sock #1 languished in its bag for weeks and then months while I started and then finished ten other knitting projects instead, 2019 rolled over into 2020, and then kept right on rolling along.

I bound off the first sock 18 months after I started it, and then proceeded to knit the second sock in about 2 weeks, because it was clear if I didn’t do it immediately I would never do it at all.

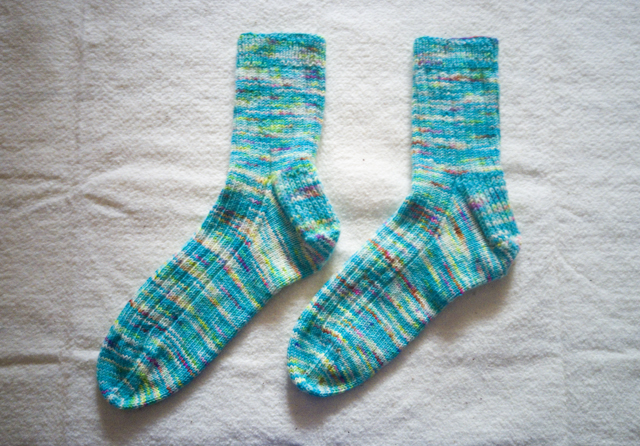
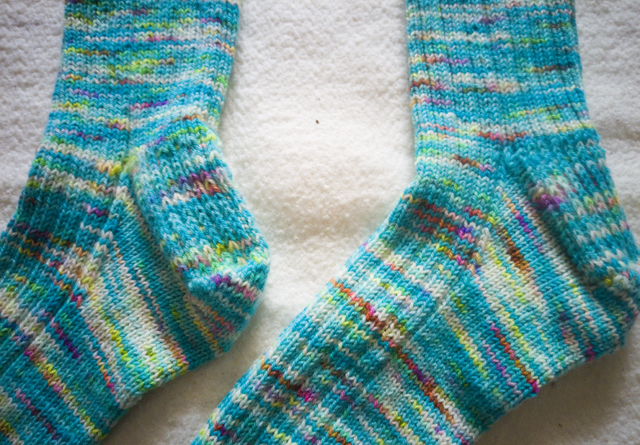
As the title suggests, I didn’t use a particular pattern, but instead combined several techniques to get a custom fitting toe-up sock, including using Judy’s Magic Cast On (free), the Fish Lips Kiss Heel ($1), and Jenny’s Surprisingly Stretch Bind Off (free). I only shelled out for the FLK Heel instructions because I wasn’t happy with any of the short row heel methods I’d already tried, and I do feel like I got a better result with them than I had with the other methods.

But like many knitters before me, I found the instructions frankly obnoxious. They’re far, far longer than they need to be, the formatting is ugly as well as unfriendly to anyone who doesn’t want to read a novel, and the “mother knows best” tone is grating when you don’t think knitting socks is a thing to be frightened of. I’ve half a mind to rewrite the dang thing—I’m betting I could fit all of the essential material on the front and back of a single letter-sized sheet, which would be much easier to reference than the 16 pages that come in the packet.

Anyway.

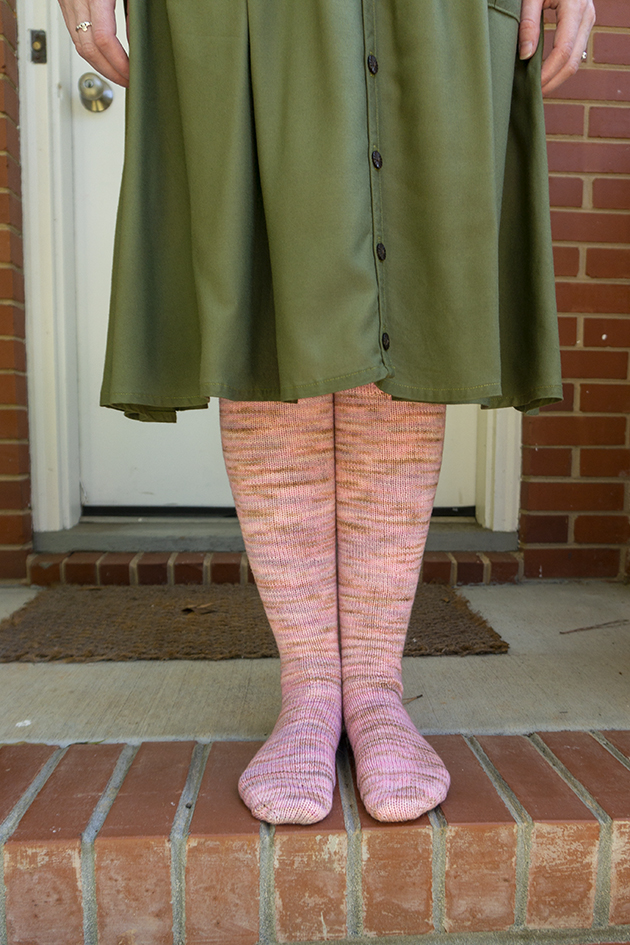
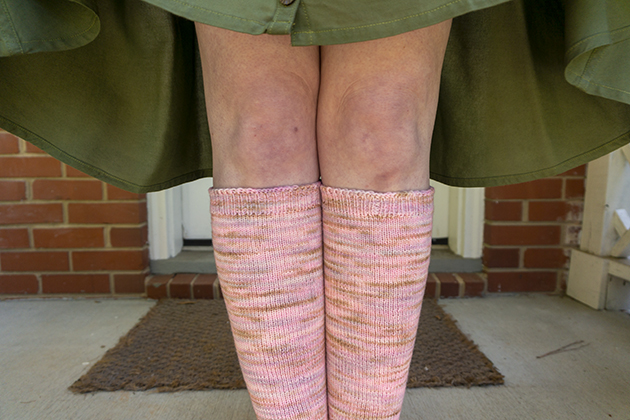
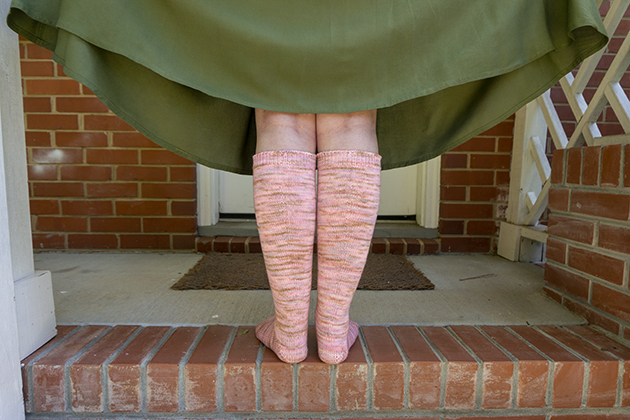
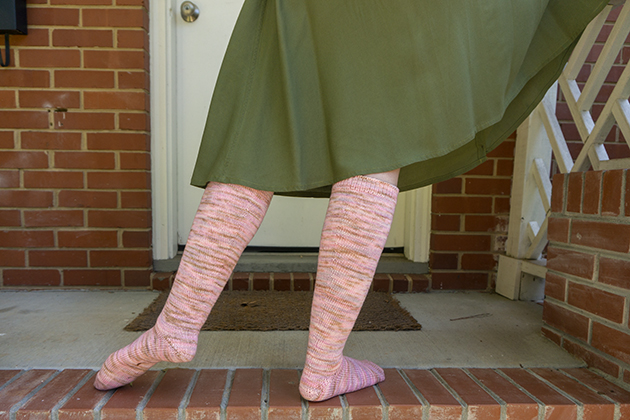
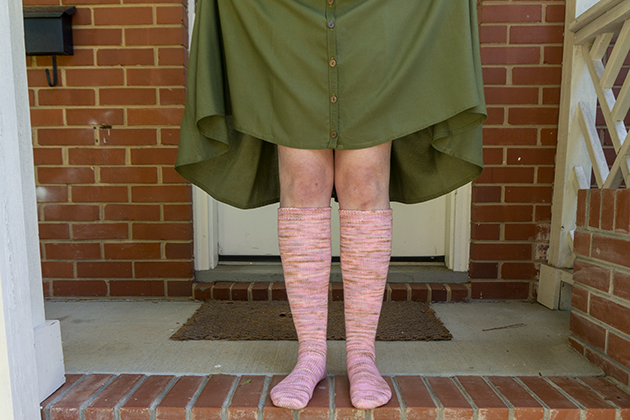
I ended up with knee socks because I’d divided the cake into two equal balls by mass to start and then knit until I ran out of yarn. (OH YEAH, the yarn! It’s Hedgehog Fibres Sock in color Whisper, purchased from Warm ‘n Fuzzy in Cary.) Luckily for me, the first ball was slightly shorter than the second; I matched the second sock to the first with a scant 9 yards leftover, and no ripping and re-knitting to make them identical. Small victories, right?

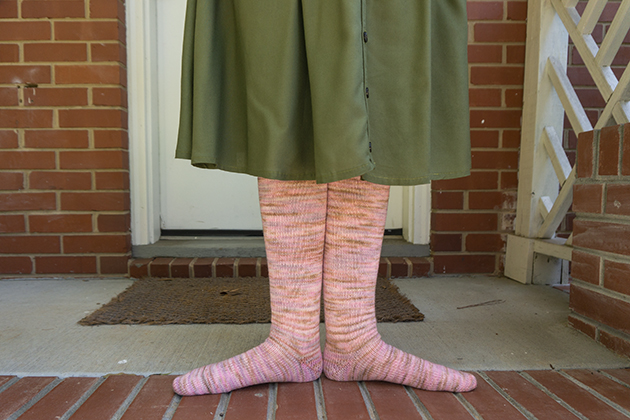
After wearing them around, I feel like they’re just a smidge short, stopping on my calf muscle instead of behind my knee. As a result, they want to start wriggling their way instead of staying firmly in place. I may run a length of elastic cord through the top edge to give them more staying power.

Other than their height, they fit quite well. I’m pleased that my calculated rate of increase worked out and netted me a snug but not tight fit around my larger-than-average calves. I look forward to wearing them when I finally get to break out my tall boots. (Soon…)


Outfit Details

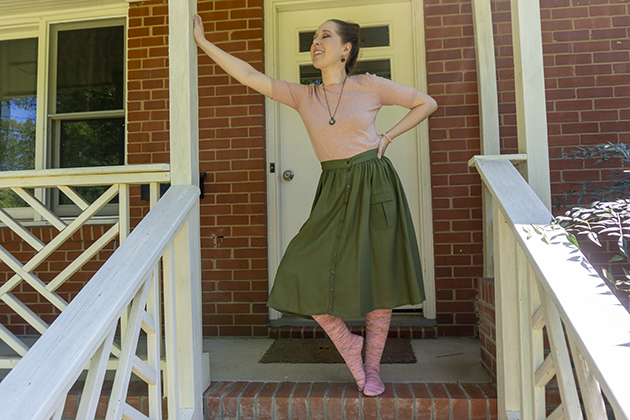
Sweater: H&M | Skirt: Colette Zinnia | Earrings: Polished coconut shell/maker unknown | Necklace: Plaid Love Threads | Bracelet: Old/unknown

A Little Handmade Christmas, Part 2

Content with the handmade cheer I’d poured into our home, I set about lavishing it on a few of my loved ones. My sister-in-law and dear friend Heather is a collector of mismatched socks, and it only felt right that she should have a truly special handmade pair in her sock drawer. I’d entertained the idea of making her socks last year, but chickened out at the last minute—I had no doubt she was knitworthy, but I thought there were other things she needed and would enjoy more.

With Justin’s encouragement, I threw my doubts aside and cast on Glenna C’s A Nice Ribbed Sock. The yarn is Hedgehog Fibres Sporty Merino in color Bubble, from my beloved LYS Warm ‘n Fuzzy. I made my usual adjustment of going up a needle size, but otherwise knit the pattern as written. Details (like the length of the leg and foot to fit a women’s size 9.5 shoe) can be found on my Ravelry project page.

I was lucky enough not to suffer second sock syndrome, although I was a little rushed to finish them before we got on the road to see everyone for Christmas. I managed to make my right wrist and forearm rather sore for about a day, which is all the warning I need to take it easy on future projects!

Heather loves them and has hinted that she wouldn’t mind another pair, if I felt so inclined. I’m a bit jealous, though, as I don’t have any handknit socks of my own, so she may have to get in line!

My second gift, and the biggest undertaking of my four Christmas projects, was a casserole carrier for my sister, Loren. She loves to cook, and on many occasions she’s taken meals to friends: to celebrate special occasions, to take care of them when they weren’t able to cook for themselves, or simply to enjoy their company. Transporting a steaming pan of lasagna or enchiladas across town isn’t exactly a cakewalk, though, and last year she casually mentioned that she was looking for a carrier to make it easier to bring hot dishes to potlucks and the like.

As with Heather’s socks, I thought a lot about making her this gift, but again, I lost my nerve. I doubted my sewing was up to the task, feared she wouldn’t like pattern or fabric I picked. I settled for other things I knew she wanted, things that felt easy and safe.

You have to understand, though, that my sister is really, really good at giving gifts. She’s attuned to everyone’s changing hobbies and evolving interests. She’ll be out shopping and see something that reminds her of you, and she’ll bring it home. Maybe she sets it aside for a birthday or holiday; maybe she gives it to you right now, just because. She also has a knack for searching out something you want and, when she can’t find the exact thing, picking something else that you end up liking even better.

I felt I’d let her down when didn’t make her the casserole carrier, but she graciously didn’t say anything more about it, and I squashed the feeling until it didn’t bother me anymore.

It bubbled up again—boiled over, really—when, a full year later, she mentioned a casserole carrier again among the things on her wish list. She was quick to qualify her wish by saying it didn’t need to be handmade, purchased would be fine too if handmade was too difficult—but handmade would be very nice.

Well. That settled that. I wasn’t about to buy this thing when I could, after all, make it. I had my brief; I set to work.

Photo by Loren

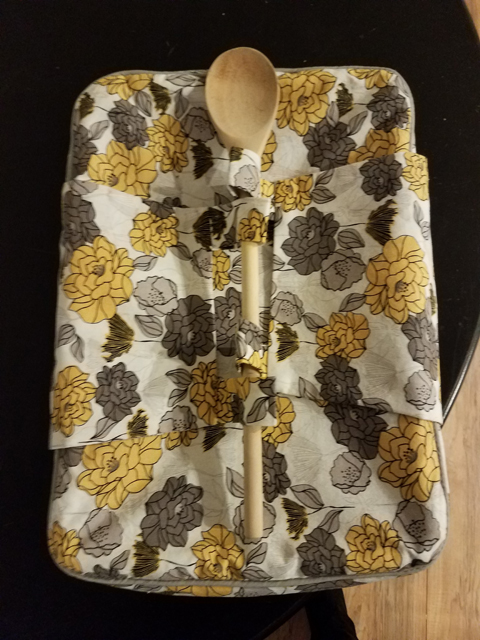
The pattern is Simplicity 1236, which offers carriers for a 9″ x 13″ rectangular baking dish and a 2.5-quart oval dish, round bowl covers in three sizes, and soft-sided dishes similar to a key tray or bedside catch-all.

Photo by Loren

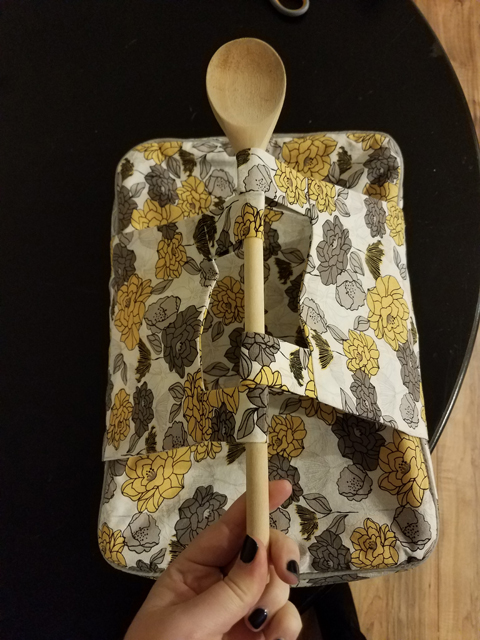
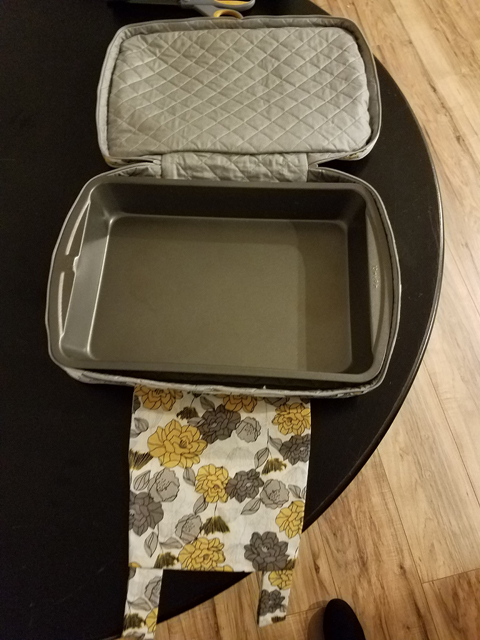
The rectangular casserole carrier has a quilted lining, double-zipper closure, decorative piping, and loops to hold a wooden spoon or dowel to create a handle.

Photo by Loren

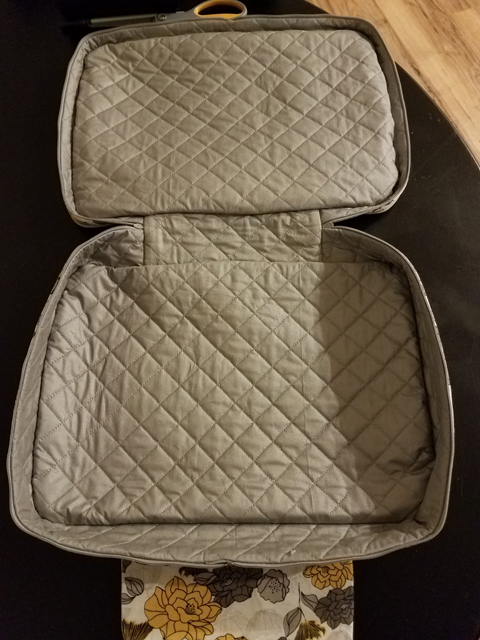
The pattern calls for “quilted ironing board cover fabric” for the lining. The only ironing board fabric I could find (at JoAnn) was un-quilted. Instead of searching online, placing an order with another vendor, and waiting for it to arrive, I did the only logical thing I could think of at the time: buy twice as much fabric and a package of cotton batting and quilt all of the lining myself.

Indeed, it was probably the most logical thought I had at all, considering I was in my second JoAnn store of the day and having a hunger-fueled meltdown trying to select the fabric for the outer shell. (It was very important to me to get it right, and I could not be persuaded that any number of fabrics would be “right.” Suffice to say that I have a very patient husband.)

Photo by Loren

I relied on my walking foot with quilt guide to get the lines spaced evenly at 1 inch apart on the bias. Initially it was quite easy and mindless to sew, though by the end I definitely got bored and was ready to move on.

Since I knew I’d committed a fair amount of time to making the lining, I went ahead and purchased coordinating piping rather than making my own, and I have no regrets about that. I was able to get a pretty good match between the piping, zippers, and light grey flowers.

I followed the assembly instructions to the letter, and I’m happy with how neatly things came together overall, especially considering I don’t have a lot of experience doing three-dimensional corners. As you can see above, the entire inside is clean finished; there’s only a small amount of hand-sewing needed at the “hinge” to accomplish it.

There are only two things I would do differently. The first thing would be to interface the handles, which felt a bit flimsy. (I entertained the idea of making a second iteration out of a sturdier material like canvas, but I’m afraid that it would get too bulky to manipulate at the end, especially easing the corners).

The second thing would be to find a way to invisibly (or at at least subtly) tack the lining to the shell. As designed, the two are connected at the edges but not the centers, which provides that lovely clean finish but means that the two have a tendency to separate. I don’t think it’s even noticeable when there’s a dish in the carrier, but again, it makes the whole thing seem a bit flimsier than it probably is.

Loren seemed genuinely delighted when she opened this up on Christmas morning, and excited to put it to use. I hope that it holds up well and stands her in good stead through many family-style dinners and special gatherings.