

Turning Point

Caitlyn is standing in a local park with one hand on a tree and the other on her hip. She's wearing a striped sweater and jeans and smiling directly at the camera.

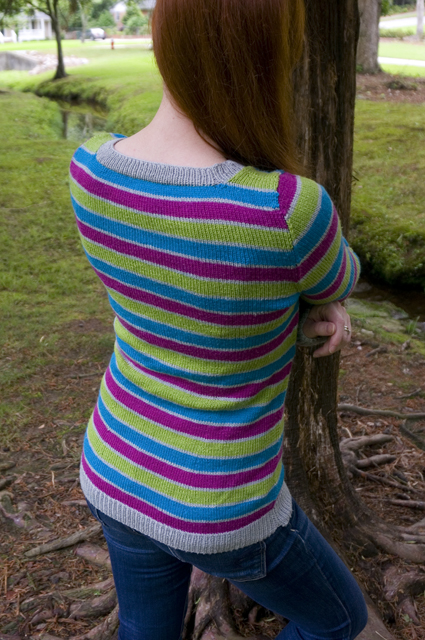
Caitlyn is standing with her back to the camera and her hair pulled forward over her shoulder. Her striped sweater has alternating rows of fuchsia, turquoise, lime, and light grey with light grey ribbing at the neckline and hem.

Caitlyn is hugging her chest and looking playfully over her shoulder at the camera while showing off how the pink, blue, green, and grey stripes on her sweater match across the side seam.

A close-up of Caitlyn's forearms and hands. Her striped sweater has wider fuchsia, turquoise, and lime stripes alternating with thinner light grey stripes, and light grey ribbed cuffs.

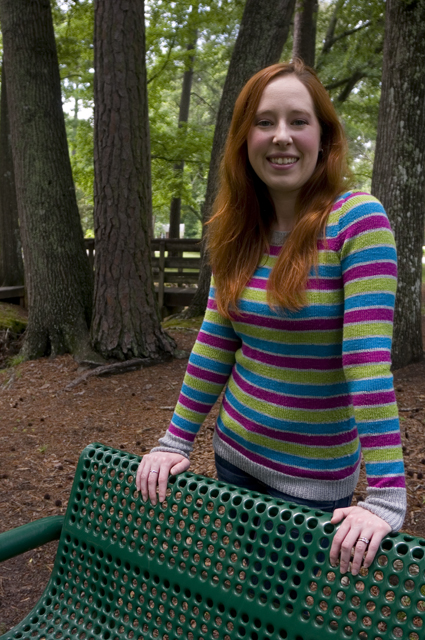
Caitlyn is resting her hands on the back of a green park bench and smiling at the camera. The stripes on her sweater aligned across the body and sleeves, and the ribbing on the cuffs is echoed at the hem.

Given this sweater was on the needles for two years and two months, is it any surprise the photos sat on my phone for nine more months after that?

I kicked off this project right at the end of 2015, and I showed my progress on it at the beginning of June 2016. I’d just started on the sleeves when we experienced the basement flood that derailed the remainder of our summer, and that cemented 2016 as a terrible year for us. (There were many terrible things that happened that year. It was a bad year for everyone. But that was our personal tragedy.)

Eventually—I don’t remember when—I pulled the sleeves out of their abandoned project bag and finished knitting them. I’d ignored the CustomFit instructions for binding off the shoulders in favor of using short rows, as usual following the handy guides provided by TECHKnitting and Knitty. Seaming the shoulders was a cinch using a three-needle bind off.

Attempting to set in the sleeves (in the flat) revealed that I’d made a mistake on one of the sleeves and the cap wasn’t tall enough. I wish I could say where I’d gone wrong, but apparently I didn’t see fit to leave myself any explanatory notes about this. I ended up ripping out the sleeve cap to the underarm bind off and re-knitting, meticulously counting decreases on the second try.

Setting in the sleeves so that the stripes matched across the upper chest and the sleeve caps was a struggle and a half. I looked at many, many pictures of hand-knit and ready-to-wear tops with stripes to determine what properly matched stripes should look like. (I later discovered the Seamwork article “How to Match Stripes Like a Pro” also gives a clue.)

I concluded that a match stripe is typically located at the widest point on the chest, which generally corresponds to the lowest point of the armhole. You can place the match stripe at a higher point on the chest and sleeve, especially if you’re cutting and sewing a garment, but the armhole bind off provides a convenient matching point to work from on hand-knits. Importantly, you may be able to match more than one stripe above it, depending on the height of your stripes, but the closer you get to the top of the sleeve cap, the less likely the stripes are to match.

This should have been obvious to me, since I had specifically worked out what color stripe to begin the sleeves with precisely so my stripes would align at the armhole. But when it came time to seam, I got it in my head that I should be able to match all of the stripes on the sleeve cap to those on the body. That was an evening of self-induced crazy-making, let me tell you.

Once I finally stopped trying to achieve an impossible perfection in stripe-matching, setting in the sleeves and then sewing up the side and sleeve seams proceeded as usual—mattress stitch all the way!

I mentioned in my progress post that I was using one of TECHKnitter’s eight tricks for weaving in as you go. I chose the overcast method because it can be used for same-color or different-color joins in both flat and circular knitting (so versatile!) and because it’s recommended for fine yarn (no added bulk!). Unfortunately, I haven’t mastered the proper tension required to make this work well, because the tails are distorting the stitches they’re trapped against. Some stitches are pulled taller and other are squashed shorter, making it looks like there’s jog in the stripes. It’s not visible at a distance, but I can see it when I’m looking at the sweater up close and it bugs me (probably more than it should). My solution will be to only knit stripes where the unused yarn can be carried up the edge of the work. Or knit fewer striped garments. (AHHAHAHA yeah, right. Like I can stop myself.)

Even weaving in as I knit, I had an unforgivable number of ends to deal with. To stave off utter despair, I made myself weave in about half of them before I let myself pick up and knit the neckline. It helped. Somewhat. I still had to weave them in, but breaking the work up over a couple of evenings before and after the final knitting sprint did keep my twitching eye in check.

Now that I’ve not only come to the ends of the ends, but also worn the finished sweater a couple of times, I feel like I’ve formed an honest opinion of it.

I’m glad I knit a CustomFit design more or less as written. My previous CustomFit sweater involved heavy modification due to less-than-optimal yarn selection. This sweater has given me an opportunity to evaluate my measurements and what CustomFit thinks of as a close fit, including the placement of bust darts, the circumference of sleeves, and so on. Overall, I’m happy with the silhouette, and I’m less inclined to tinker with the pattern generator to try to get an even slimmer fit (which could result in unflattering straining or wrinkling).

When I wore it out for the first time, I was lukewarm about my yarn choice. I love Cascade Heritage Silk (blogged evidence here, additional proof on Ravelry) because it’s an affordably priced wool–silk blend that offers next-to-skin softness and a rainbow of colors. But the drape of the silk means that it can feel like it’s bagging out when I bend or sit and sagging over the course of the day. But after multiple wears, I’ve realized this is mostly in my head. While it’s true it doesn’t have the recovery of 100% wool, it doesn’t actually grow with wear or get sloppy-looking. For a lightweight sweater worn on its own or over a camisole, it’s a solid choice and I’d recommend it.

The turning point this sweater is named for was the realization that this sweater pairs exclusively with jeans and gym shoes. It doesn’t look like any of the other sweaters in my drawer; it doesn’t go with anything else in my closet. It clashes with my complexion, especially now that I’m a redhead.

The candy-colored yarns that were irresistible on the shelf seem strangely muted when knitted up together. (I know that’s hard to believe, looking at those photos.) Their vibrancy waned with my enthusiasm, and didn’t return even after I finished the project.

I remember when I got those yarns, from the now-closed Yarn Tree Studio in Raleigh. I bought them first and foremost because they looked good together, like they belonged together. Not because I wanted to wear them. Which is so silly, in hindsight, because I’d always intended to wear them—as a sweater, as a shawl, as a something. I only saw them as “pretty yarns,” and didn’t for a moment consider them as “the stuff to make clothes.”

I could defend my decision by saying I bought the yarn six months before I did Wardrobe Architect for the first time, but I find I’m not actually interested in justifying this sweater to myself. Instead, I feel like I’ve finally learned something that all of the meditations and mood boards didn’t drive home for me: just because something looks good on the rack/on the yarn or fabric shelf/on someone else, and just because I like how it looks, doesn’t mean I need to own it or wear it.

If my goal right now is to have more things in my closet that work together to create cohesive outfits, then I need to think about my buying and making in terms of projects that support that goal. There’s nothing wrong with owning styles that aren’t “flattering” or are one-of-a-kind, unless my goal is to have more garments in flattering colors and remixable shapes—then I’m just going out of my way to dilute my closet and increase the chance I’ll have “nothing to wear.”

I don’t like making mistakes, and the idea of learning from my failure has never captivated me—I’d much rather save time and heartache by learning from the mistakes other people have already made, if that’s an option. Despite reading and observing other people’s style journeys, it took personal experience to learn this particular lesson about making what I want to wear. It was a long walk, but I got there in the end.

I’ve already seen the payoff: during a trip to the New York City Garment District this summer, I went with a plan to look for specific fabrics intended for specific garments, all of which should work together in a variety of combinations. As soon as I catch up on my backlog of finished projects from the last few months, I’ll share my autumn/winter sewing plan, which is already in full swing!

Caitlyn is sitting on a green park bench facing away from the camera toward houses in the distance.

Sprout Patterns, Learning with Lladybird, and Blush Pink Floral Archer


When Lauren announced back in April she was partnering with Sprout Patterns to do a sew-along—really, a workshop—for the Archer button-up, and that it would be held just 30 minutes from where I live, I knew I had to jump on it. The event ticked a bunch of boxes at once:

  • I’d been meaning to visit the Spoonflower headquarters in Durham since I moved to North Carolina five years ago
  • I’ve wanted to try a Grainline pattern for ages but couldn’t quite justify the purchase when I have a stash of patterns and fabrics waiting to be used already
  • I’ve thought about taking a sewing class as a way to be more social while improving my skills, but most classes are aimed at absolute beginners and tackle projects I’m not interested in
  • Lladybird was one of the first sewing blogs I started reading regularly, and I couldn’t resist the opportunity to meet a sewing celebrity

Because this was the first time Sprout Patterns had done a collaboration like this, the process was a little hazy at times. For instance, there was a very limited number of spots in the class, so registration was first-come, first-served. All well and good, but when I submitted my registration through their online form, I received an email with the subject line “2018 Sprout Sew-Along with Lauren Taylor” and the sender “Confirmation Message” but a blank email body. Hmm. Did this mean that I had secured a spot, or merely that my request had been received and I was on the waiting list? Nail-biting ensues. Five days later, I received another email that confirmed I had indeed scored a coveted seat in the class. Whew, that was a relief! I assume they had to handle some portion of the registration manually and that was the cause of the wait, but a simple message up front could prevented a bit of unnecessary anxiety for those like me who did get in, and tempered the expectations of those who ultimately wouldn’t.

The confirmation email included a simple schedule (meet-and-greet on Friday night, sewing all day Saturday and Sunday), a pre-class checklist in the form of a Google Doc, and a link to video explaining how to order your pattern and fabric through the Sprout Patterns site. I confess I only skimmed the video, as the process of purchasing the materials was pretty straight forward: follow the steps to order a Sprout Pattern as you normally would and use a class-specific coupon code to get the pattern of your choice printed on Kona® Cotton Ultra with free shipping.

If you’ve spent any time on the Spoonflower site at all, you don’t need me to explain the hours I spent browsing for the perfect print for my Archer—there’s an overwhelming number of pretty, quirky, colorful, fun, bold, and bizarre designs already available even before delving into creating your own.

But I’d also suggest the severely constrained browse/search functionality on the site makes choosing a design more arduous than it needs to be. You can browse By Designs or By Color, which uses a system of categories and sub-categories, but if you select one of these you can’t narrow your criteria any further. You can do a search instead, but it’s really unclear whether this search is looking at the name of the category or categories the design is in, the name of the design itself, a set of invisible keywords, or some combination of the three. Using or not using quotation marks around your search terms does change your search results, but not in a predictable way. It’s frustrating to say the least, especially since there are plenty of models for different, successful systems.

After narrowing my favorites to around 30 designs, most of which were line art florals or dots/spots, and most of which were on a coral or blush background, I settled on Botanical Sketchbook – Floral Pink Blush by Heather Dutton. Then I popped over the Sprout Patterns site and selected the Archer pattern, View A, Size 2, and picked the design from my Spoonflower favorites. (You don’t need to browse Spoonflower first and then go to Sprout—you can browse designs directly on the Sprout site—but I found it easier to browse in the full-window view of the former as opposed to the smaller pop-up window browsing available with the latter.)

Sprout generates 2D and 3D models to help you visualize the scale of the design and determine its placement. The models are very helpful for avoiding unfortunate print placement, but the one shortcoming I see is that the pattern pieces aren’t labeled in the 2D model, so it’s possible to start dragging the print around without immediately seeing which piece you’re affecting, particularly in the case of small pieces or ones that are mostly hidden on a finished garment, such as a collar stand. In my case, I confused the pieces for the pockets and the cuffs, and it took an embarrassingly long time to figure out why I couldn’t move the large round flowers plastered over the nipples. Eventually I was satisfied with my choices, and I put the order in my cart and checked out with the coupon code with no issues.

It’s at this point I should probably mention that I felt a great deal of anxiety about placing my order, for a reason that I hadn’t expected. See, I’d received confirmation that I was registered for the class on February 28 along with instructions for ordering, and the class itself was scheduled for April 6–8. But I never actually received any guidance on how quickly I needed to place my order to allow enough time for it to be printed and shipped. The Sprout FAQ mentions that “average turnaround time for all products is 2-3 weeks,” but none of the correspondence mentioned this, or even directed students to the FAQ. I think the organizers must have assumed that everyone would want to get their patterns and fabric in hand as soon as possible, and it was never my intention to dally, but by the time I saw that key piece of information, there was a lot less than three weeks left, and I was in a bit of a panic. Again, a quick email would have done wonders here—a little “hey, if you haven’t ordered yet, you’ll want to do that soon!” would have been enough to make me commit to a decision.

Luckily, my order shipped in just two days, and since I’m in the next town over, it only took a few more days by mail to land on my doorstep. I had plenty of time to pre-wash my fabric and swing into JoAnn to pick up interfacing, coordinating thread, and basic translucent shirt buttons. In terms of tools, we were expected to bring our own sewing machines, pins, needles, snips, and so on, but scissors, cutting mats, irons and ironing boards, and sergers (for finishing seams) were provided.

On Friday night, the class gathered for a meet-and-greet with Lauren, who is exactly the person in real life that you’d expect her to be from her blog (which is something she stressed is important to her when she did her interview on the Love to Sew podcast). We snacked and drank and cut out our patterns while she chatted with us about sewing, blogging, and even gave a peek into her personal life.

Saturday and Sunday were both sewing days. Rather than do a sample project, showing us each step and then having us to it ourselves at the same time, Lauren chose to give us a short set of instructions to tackle a particular section of the shirt, and then when the first person hit a roadblock, she’d mime the steps to complete the task on that student’s pieces, folding or pointing or marking (but not sewing) as needed. If any student got behind, or needed to see the steps again, she’d walk them through it individually on their own shirt. She said she was happy to repeat herself as many times as needed, because she’d rather have students work at their own pace then be handcuffed to the rest of the class, with the speedier students feeling bored and the slower students feeling anxious. I’d say it worked pretty well: it allowed us plenty of time to socialize, observe each other’s progress, and take breaks as needed to avoid becoming tired or frustrated. (The snacks and grown-up beverages available throughout the day didn’t hurt either.)

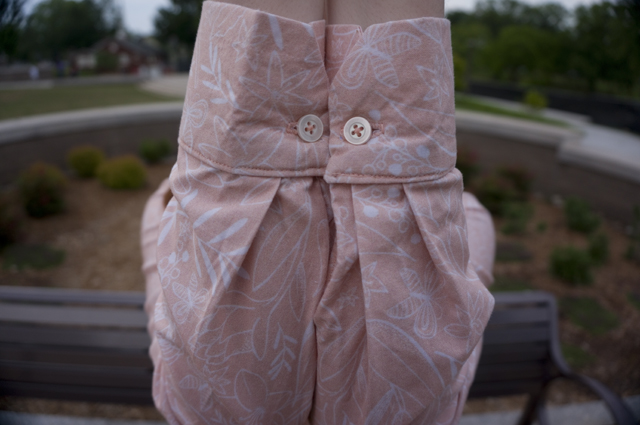
Because our sewing time was divided up over two days and limited to about six hours each day, we ignored Grainline’s order of operations and also used a couple of alternative methods. For instance, we attached the plackets, collar stand, and cuffs to outside of the shirt and then topstitched from the inside to avoid needing to re-sew if the topstitching veered off course and failed to catch the fabric on the inside. We also used the burrito method to get a clean finish on the yoke, which I quite like.

Lauren also recommended several great tools and resources, including an expandable sewing gauge to mark buttonhole placement (always put a button in line with the apex of your bust to avoid gaping!), a buttonhole chisel, and weft interfacing from Fashion Sewing Supply. (At least, I think she recommended the weft, although the site itself advises that it’s not suitable for shirtmaking. Hmm.)

Lauren is exactly the kind of teacher I want for a sewing class: smart but not rigid, personable but able to keep things moving. I’m glad I got to take my first class with her, and hope to have the opportunity to take another class in the future (jeansmaking, maybe?)

The Spoonflower crew were also incredibly gracious hosts who were quick to offer supplies or assistance to anyone who needed them. They even made time for a tour of the facility at the end of the weekend. It’s a shame that the sew-along was the last class they had planned for the foreseeable future—the run-up to the event may have been shaky, but when it comes to day-of execution, they’re great facilitators.

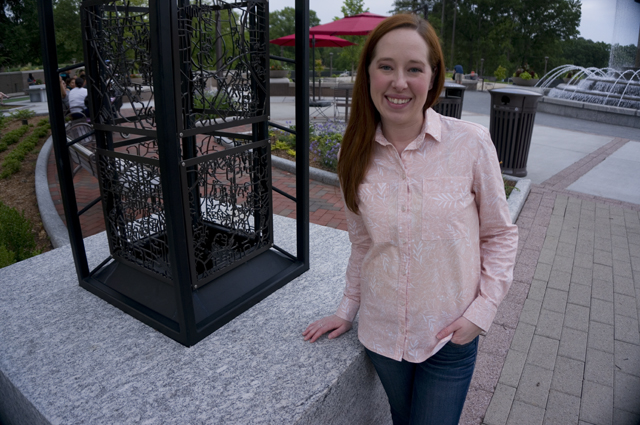
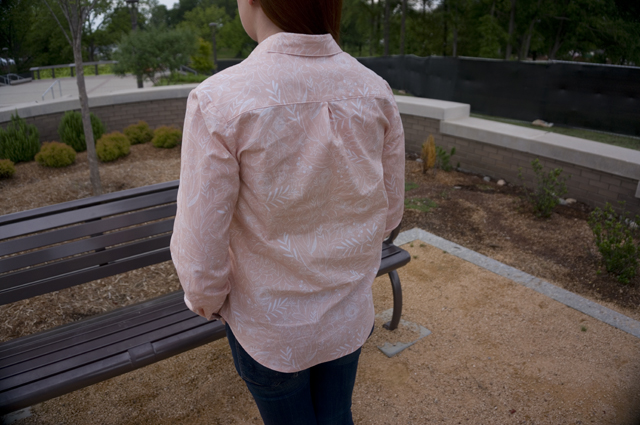
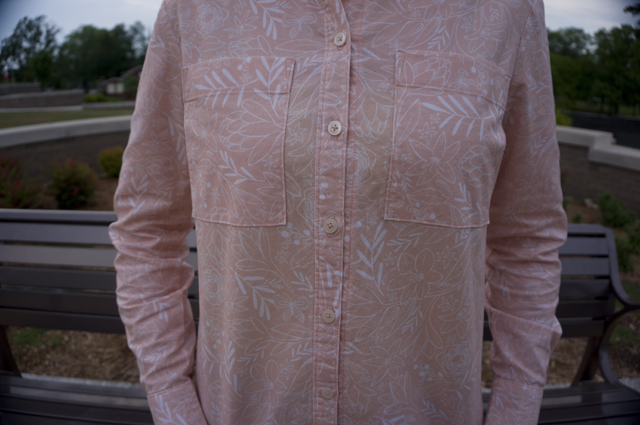
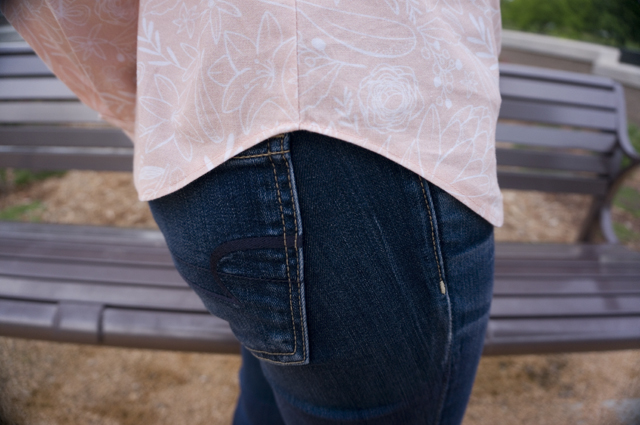
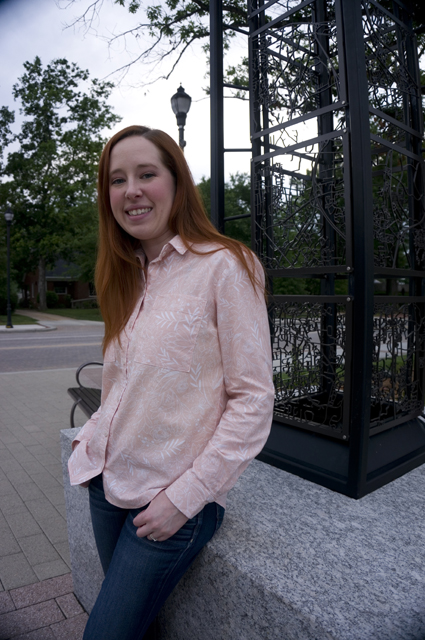
As for the Archer itself, I’m quite pleased with how it came out. I’m lucky that the Size 2 fits pretty well out of the packet; the only thing I’d definitely change is bringing in the shoulders. I love the curved hem because I don’t like to tuck in my shirts. The Kona® Cotton Ultra was easy to press and sew, but it’s thicker and stiffer than I’d prefer for a button-up shirt, and I think it may be the culprit of some of the rumpling in the back. If/when I make it again, I’ll look for something lighter like a poplin or a lightweight cotton sateen. (Probably. I’m also tempted by all the flannel for fall.)

I’ll be glad to have this shirt in my wardrobe when the weather (finally) decides to cool down, but more importantly, I’m excited to have some transferable skills in my sewing toolkit. I fantasize about being the kind of slow sewist who savors the precise construction of an impeccably fitted shirt, but I’d happily settle for becoming a halfway patient sewist who can get her pockets to match and her topstitching to stay on the fabric!

Tribute Month Sewing Notes

Have you been following Tribute Month over on the Sewcialists blog? My own tribute went up earlier this week—check it out here to read how Erica Bunker inspired this outfit, and don’t forget to follow the blogs of all the creative and inspiring contributors who made Tribute Month possible! I can hardly wait for the next theme—having direction and a concrete deadline really helped to focus my sewing, especially when I came close to stalling out right before the finish.

Before these garments are too far behind me, it seems like a good idea to record some of the more technical details of what I did. I deviated significantly on both patterns, but I do hope to make them again, and I’d like the next versions to be even better.

First, the skirt. It’s Simplicity 1465 View C, a straight skirt with a waist facing, front and back darts, and a center back invisible zipper. I’ve said many times before that I’m not fond of skirts that sit the natural waist because they feel constricting to me, and because they tend to emphasize that my waist is not much smaller than my bust and hips, making it look thicker than it is and making my whole torso look rather straight-up-and-down. But I’ve also had minimal success at finding or altering patterns to be low-rise, and after ruining a lovely lightweight yardage of navy corduroy trying to make that modification, I decided to bite the bullet and give a natural-waisted skirt a try. I wagered that, since I was planning to make it in a dressier print, I’d probably only wear it for nicer occasions anyway, and if I didn’t love it, I’d only be wearing it for a few hours at a time a few times a year anyway.

I cut a straight size 12 based on my waist measurement, but pegged the bottom of the skirt by subtracting 1 inch at each side seam (4 inches total). My waist is a fraction larger than a 12, but after reviewing the pattern pieces I was confident that there was enough ease to cover that extra quarter-inch. In fact, after wearing the skirt out to take photos, I think that I could take the waist in a little on a future iterations. I don’t know if I could go down a full size, but I could probably shave a little off each side seam—and possibly a little more if I chose not to line it or chose a slightly stretchier fabric than the mid-weight stretch cotton sateen I used here.

The pattern is designed to be unlined, but I wanted the option to wear it with tights in cooler weather, so turned to Sunni’s BurdaStyle tutorials for how to create a ventdraft a vented lining, and sew a vented lining, but modifying my pieces slightly to keep the original waist facing. These instructions used to be on Sunni’s blog A Fashionable Stitch, and I vaguely recall them being easier to follow when I used them the first time. I managed to muddle through them with much reading, re-reading, and test-folding my fabric, but it does bug me (more than it should, to be honest) that they create a vent that is lapped in the opposite direction than usually you see in ready-to-wear: normally the satin stitches that tack the top of the vent in place create the appearance of the number 1. In future iterations, I’ll reverse my left and right back pattern pieces and back lining pattern pieces. I’ll also make the vent longer (taller?), because I find it shortens my walking stride a little more than I like.

One critical thing that’s not covered by the tutorial is attaching the lining to the skirt at the waist. The tutorial is written for the BurdaStyle Jenny skirt, which has a waistband, so you can follow all of the steps for attaching the lining to the skirt at the vent and then worry about attaching the lining to the skirt at the waist afterward. Because I was using a pattern with a facing instead of waistband, I figured out that I needed to attach the shell and lining at the waist first if I wanted to be able to get a clean finish, including understitching the waist facing to keep it lying flat. Once the waist was taken care of, then I could follow the instructions for attaching the lining to the vent, and then finally handle attaching the lining to the zipper tape so that it doesn’t get caught in the zipper.

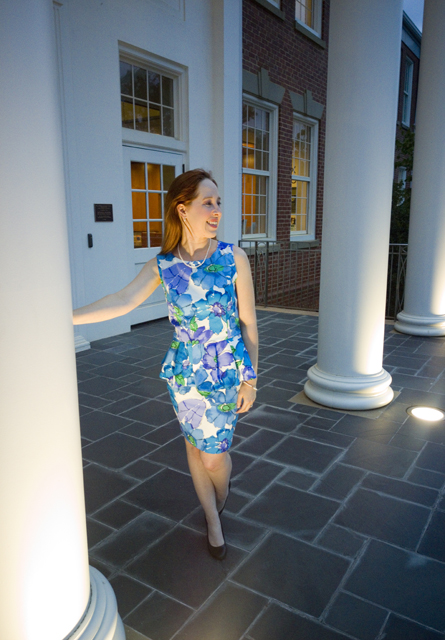
And now, the top. It’s Simplicity 1425 View E, a sleeveless, princess-seamed top with a pleated peplum. Although my measurements put me in a size 12, I cut a size 10 after seeing that the pattern has 3.5″ of ease at the bust and 4.5″ of ease at the waist. If/when I make it again, I’ll go down a size; with such a contoured style, and especially in a fabric with stretch, I’d like it to fit more closely to my body than it does.

When I pulled this pattern from my stash to sew, I actually thought it was designed with a back zipper, and it wasn’t until I had cut out all the pieces and was skimming the instructions before starting to sew that I realized it has buttons. I can’t imagine making it that way; it’s not loose enough to render the buttons purely decorative, and having to do them up behind my own back—with fabric loops instead of buttonholes, no less!—is not my idea of fun.

Despite some initial trepidation about using a separating metal zipper, the entire process was painless, easier than installing an invisible zipper. I used an 18″ zipper, which ended up about 3.5″ shorter than the length of the top. I knew that the top of the skirt would come up higher than the bottom of the zipper, and if I’m wearing it casually with low-rise jeans I don’t mind the possibility of flashing a tiny sliver of skin, but if that’s a concern then definitely consider getting a longer zipper and shortening it.

For both pieces, I finished things cleanly and invisibly everywhere I could. The skirt lining has French seam; the skirt shell has serged seams (I thought Hong Kong seams, while lovely, would be too bulky and hidden anyway); the cut edge of the skirt hem is covered with a fun purple grosgrain ribbon and blindstitched in place. The top has bias facings at neck, arm, and peplum hem, all blinstitched as well. I enjoy hand-sewing, but next time I’ll draft an all-in-one facing for the bodice.

On the whole, I’m very pleased with how the entire outfit came out, and I’m very much looking forward to wearing it to a professional event in October. It’s also restored some of my desire to sew with wovens (or stretch wovens, at least), because it proved that I could find middle ground between a comfortable fit and a flattering silhouette. I doubt they’ll overtake knits in my wardrobe, but at least I can regard them with a little less prejudice.

Concept and Iteration

How did I arrive at a point in my life where I didn’t own a solid white or a solid black t-shirt? It’s certainly not because my wardrobe is dominated by prints—easily 90% of my clothes are solids. It’s also not because I eschew basics—I tend to buy staples like v-neck sweaters and button-up shirts in multiples, and I own few, if any, pieces I would consider “statements.” And yet here I was, lacking in the most basic of everyday garments (after underwear, of course).

The last few times I’ve tried to buy plain white and black tees, either short- or long-sleeved, I was deeply disappointed by the options available. I’m sure you’re all-too-familiar with the scene: racks of tissue-thin shirts that cling unflatteringly, bind up around the arms, and fall apart in three washes or fewer. No thanks.

I had plenty of white and black cotton/spandex blend in my stash, as well as a PDF copy of the free Tonic T-Shirt pattern from SBCC Patterns. I’d attempted the pattern before and wasn’t happy with the results, but I was determined to get it to work so that I’d have a well-fitting pattern at my disposal whenever I wanted/needed to whip up a new tee. (I also really want SBCC Patterns to work for me, because they’re specifically drafted for petites and I’d love to be able to support someone pitching my niche.)

As it turns out, my issue with the fit of the first attempt came down almost entirely to size selection. I’d sewn a small because I didn’t want the shirt to be too snug in the waist or hips, but that meant the finished bust was 1″ larger than my actual bust. Also, I must have taken my waist measurement on a day when I was bloated or something, because I’ve since re-measured at a slightly smaller size. These measurement issues, combined with a fabric that wants to mold rather than drape, made for an ill-fitting shirt that went straight into the recycling heap.

This time around, I cut out an extra-small (in white) in order to get negative ease at the bust and was much happier. To concentrate on neat, even sewing with no puckers or wavy seams, I basted everything with a zig-zag stitch on my sewing machine and then went back over everything with my serger. It takes twice as long, but it’s the only way for me to get a good finish. Maybe one day I’ll be able to zip everything through the serger without putting holes through the middle of the fabric, but today’s not that day, and tomorrow’s not looking good either.

I prefer to install my knit bands in the round rather than in the flat because I feel like I get a cleaner finish that way, and I had to cut off 1″ of the band in order to have a loop that was smaller than the neck opening. (I also prefer to sew my seams and then turn up and topstitch my hems for the same reason. So, I basically ignored the instructions and used the alternative method for every step. It worked out fine.)

With the proportions sorted out, I noticed two things: the hem has a tendency to ride up, most likely due to the amount of negative ease through the body, and the neckband was difficult to serge and topstitch down evenly due to its narrowness.

I immediately cut out another shirt (also in white), but lengthened the bottom hem straight down by 1.5″ and doubled the height of the neckband. I chose to add length at the bottom rather than at the lengthen/shorten line because the narrowest part of the shirt does seem to be hitting the narrowest part of my waist. This worked exactly as I planned, but for someone long-waisted, the lengthen/shorten line is the way to go.

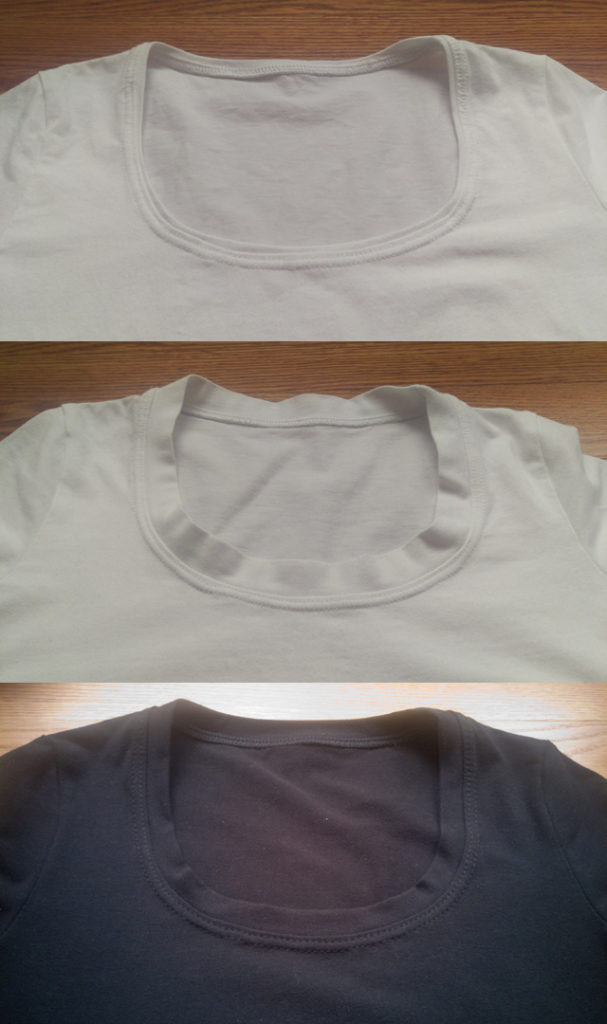
I like the double-height neckband—it somehow has a more casual feel—but even with the previous alteration of shortening it by 1″ it was a little too long, and even after pressing it’s noticeably wavy. It’s no worse than you’d find in some ready-to-wear, but it’s something I wanted to fix on future versions.

With that in mind, I cut out a third and fourth shirt, both in black. For this iteration, I cut an XXS neckband instead of an XS and reduced the height of the neckband to 2 1/8″. This new neckband is now taller than the original but shorter than the doubled version, and it just might be perfect. I could probably shave a tiny bit more of the length off to get the band to lay completely flat, but I’m not sweating it.

At this point, I also lengthened my topstitch from 2.5 mm to 3.5 mm, which made the stitches a little more visible without being sloppy.

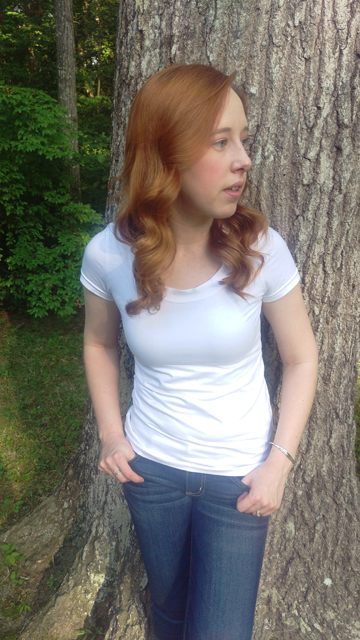
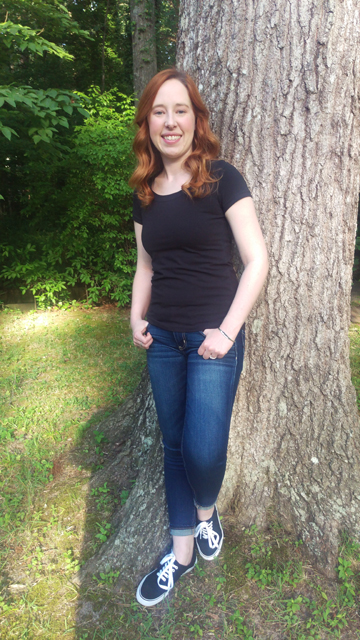
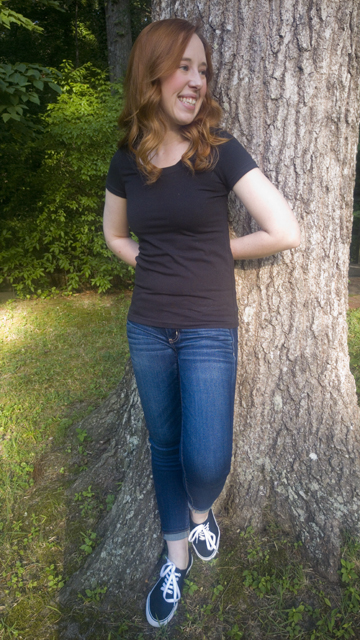
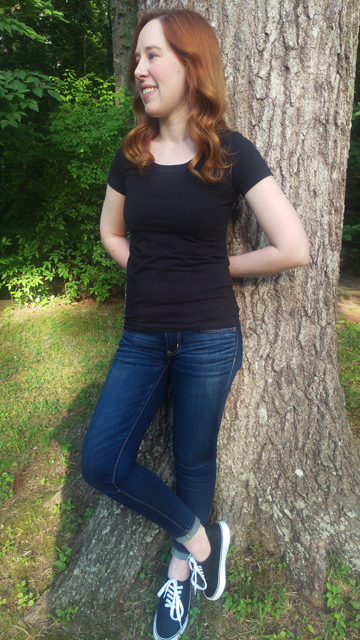
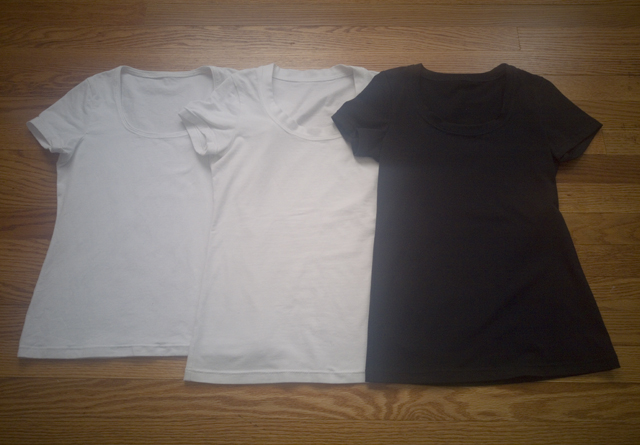
Below are the three version to give you an idea of what the differences look like in context. Black and white do not like to be photographed together like this, so the exposure/contrast is absolutely awful, but I hope it gets the point across.

Here’s a look at the necklines up close, so you can see the differences in neckband height:

One last thing I’d like to mention is that Steam-a-Seam 2 is the not the same as Dritz Wash Away™ Wonder Tape. At some point I had rolls of both in my notions collection, but I must have used up the latter on a previous project. I grabbed the Steam-a-Seam 2 thinking that it was designed for the same purpose and painstakingly applied it to the sleeve hems and bottom hem of my first t-shirt, only to realize after heat-setting it that it’s much stiffer than Wonder Tape. It seems to have softened a bit after a couple of washes, but I definitely wouldn’t use it again for stabilizing a knit hem while sewing. Steam-a-Seam 2 Lite might work for that purpose (I haven’t tried it myself), but I think I’ll stick with Wonder Tape.

I’m so glad to have these shirts in my closet. They aren’t glamorous, but they’re comfortable, and it’s nice to feel like even on an ordinary day I have something handmade to wear.

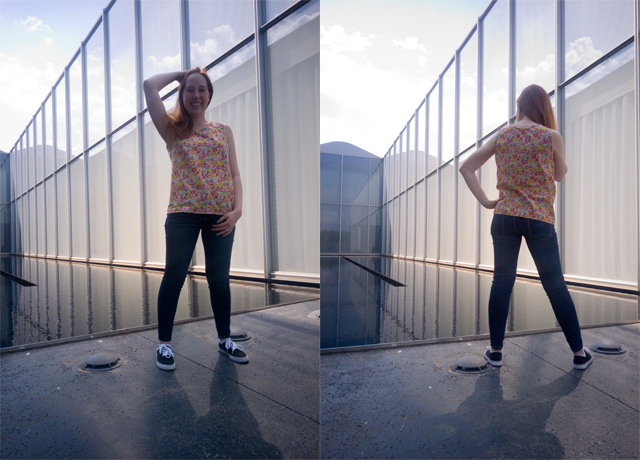
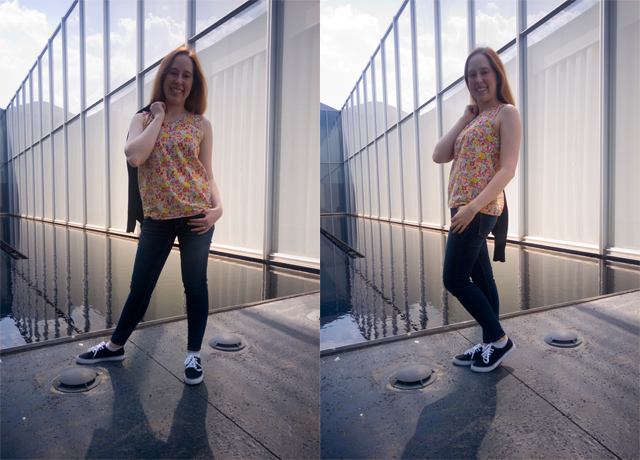
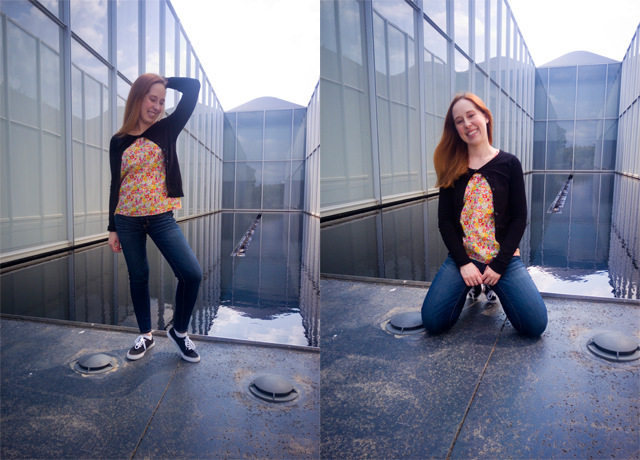
FO: Floral Sorbetto

Back at the beginning of January, I wanted to sew up a two-yard cut of navy corduroy that I bought during Hancock Fabrics’ going out of business sale into a button-front skirt. Strangely reluctant to spend money on a suitable pattern, such as the Pauline Alice Rosarí, and apparently incapable of judging the value of my own time as well, I embarked on a daring adventure to hack Simplicity 1465, which is a pencil skirt with a facing instead of a waistband, front and back darts, an invisible zip in the back, and no lining, into a pegged, button-front skirt with a lining attached to integrated waistband-and-button-placket facings. Several evenings and weekends went toward making flat pattern adjustments and baste-fitting the pieces to get the styles lines I wanted and the correct dart sizes and hip curves.

Things were going swimmingly until I had to install the lining into the shell. Suddenly, things went from fitting well to being too small to close in the front by several inches. Unsure whether it was a drafting, cutting, or sewing mistake (or all three), and lacking the fabric to re-cut all of the pieces, I fell into a sewing funk. I’d wanted the finished skirt very badly, but even after several days of cooling off didn’t feel like I had the wherewithal to sort out the mess.

Wanting to get out of my rut, I cast about for an easy project that I could accomplish quickly with few or no adjustments to boost my confidence. Conveniently, Colette had launched the New Sorbetto, an update to their original free top pattern, and I had a remnant of cotton lawn from my Garden Party Dress lingering in my stash that I felt was destined for better things than just pocket bags.

Because Colette drafts for a C cup, I cut a size 4 and did a 2″ SBA, which I prefer to think of as a Sufficient Bust Adjustment rather than a Small Bust Adjustment. Tutorials for bust adjustments abound online, but I went ahead and used the one offered by Colette on the Sewalongs website.

Side note: Measuring as an A cup for this pattern made me laugh, because I’m currently in need of new bras and I’ve recently determined that I’m not a 34B, nor even a 32C, but probably a 30D. (In fact, if I were to follow A Bra That Fits’ Bra Size Calculator, I’m on the cusp of 26E/28DD.) This isn’t to suggest I think that Colette’s sizing is wrong, but rather to highlight one of the many instances where two clothing-based industries use the same terminology—cup size—but arrive at it using two different sets of measurements: Colette is interested in the difference between one’s high bust or upper torso measurement and one’s full bust measurement, whereas bra companies are interested in the difference between one’s full bust and one’s underbust measurement. Just a little reminder that it pays to understand how a clothing manufacturer or a pattern designer approaches measurements and sizing schemes if you want to nail your fit.

My remnant was L-shaped with narrow legs, so I had to sacrifice the center pleat in order to get the front and back pieces to fit. I did, however, have a square large enough to make continuous bias tape to bind the neckline and armholes. I like that continuous method of making bias tape, but struggle to make my bias tape a consistent width when using it, so instead of binding the edges as instructed I created bias facings on the outside of garment, like the ones on the Sewaholic Dunbar, and then edgestitched them down as instructed using a dark gold all-purpose thread that matches the darker yellow flowers in the top. The bottom has a narrow hem, folded under twice and topstitched down with the same dark gold thread.

The fit is a little more boxy than I’d like, but about what one would expect from a pull-on woven top in a lightly structured fabric. I’d really like to take a crack at this in a drapier fabric like rayon challis or even a lightweight jersey; I have a few sleeveless Portofino shirts from Express that I live in during the sweltering summer months, and I’d love nothing more than to fill my closet with a pared-down version of them using this pattern.

You can’t tell here, but the fabric is slightly sheer, and the armholes are a tad low, so I’m wearing it over a white camisole. That’s how I plan to wear it to the office, but I have no doubt that on the weekends when the temperatures climb I’ll ditch the cami. In future less-sheer versions I’ll probably shave a little off the top of the straps in order to raise the armholes and bust darts slightly to avoid the need for a cami entirely.

I know the Sorbetto is old news in the sewing world, but for anyone who, like me, didn’t sew it up the first time around, I offer up this warning about the new pattern: the instruction file is really, really long, coming in at 36 pages. While I have no doubt that novices or less confident stitchers might find things like the detailed cutting layouts useful, the sheer volume here is a bit overwhelming, and it’s also a bit of a nuisance to get to key pieces of information (size charts are buried on pages 11-12, and the actual sewing instructions don’t start until page 26). Once you’ve sewn it once it would be easy enough to dispense with the instructions entirely, but if you need to quickly check for confirmation of a seam allowance or what have you, CTRL F is your friend.

Overall, I accomplished what I set out to do: I used a pattern and fabric I had on hand, made minimal adjustments, finished in a few leisurely evenings, and ended up with a top that I can wear throughout the warmer months. I’m feeling refreshed and ready to tackle more sewing projects. Hurray!